Homebound Kid Activities

As we all try to navigate the foreseeable future, one thing is clear: life is different. One of the biggest differences for so many families is children at home. So many of us are trying to teach our children, generally occupy our children in a productive way and, oh…right, work. Sonia and I are those people. We each have 3 children of vastly different ages.

So, with the help of our teacher friends, resources sent home from school and the interweb, we’ve created a list of ideas for educational and fun activities. Our plan is to create a volume 2 of this post with additional ideas that we crowd source from YOU. So, please, leave comments below, email us (hello@grayoakstudio.com), DM us on Instagram or leave a message on Facebook.

Take A Virtual Field Trip

We have an awesome list of virtual field trips. The list includes links to national zoos, farms, critter cams, museums and MUCH more. For example you can take a virtual tour of Egyptian Antiquities at the Louvre museum in France. OR (a personal favorite), you can watch the Panda Cam at the Atlanta zoo.

Podcasts for Kids

Of the long list below, Story Pirates and Circle Round are personal favorites. We’ve been listening to both podcasts for years and years. Story Pirates is a podcast where kids submit stories to the podcast and the stories are made into songs and skits. It’s ingenious. The child authors are often interviewed on the show (which my kids love) and each episode includes a “story spark”, which gives your child an idea on a story they can write. Circle Round is a podcast where famous actors (seriously…you know these actors) perform skits about fables from all over the world.

The Unexplainable Disappearance of Mars Patel

The Past and the Curious

“This Podcast Has Fleas” 

Circle Round

Tumble

Story Pirates

Grimm, Grimmer, Grimmest

The Radio Adventures of Dr. Floyd

The Alien Adventures of Finn Caspian 

But Why

Wow in the World

Brains On!

KidNuz

Smash, Boom, Best

The Two Princes

Ear Snacks

Book Club for Kids

Story Time

What If World

Stories Podcast

Flyest Fables 

Young Ben Franklin

Earth Rangers

PINNA

Pinna is an online kids library of sorts - they have kids podcasts, audiobooks and music. It is a paid subscription service, BUT they are stepping up to the times and offering a free 60 day trial with the code PINNA4KIDS.

READ ALOUDS

Story Time from Space - Astronauts from the International Space Station read books. It’s amazing.

PRINTABLE ACTIVITIES

Learn in Color - This website has tons of home schooling resources for all different subjects. We particularly loves all the great printables

Gratitude Challenge - There are 7 day challenges for gratitude, mindfulness, mindset and more.

ART CLASSES

Mo Willems - Author and Illustrator Mo Willems (Gerald and Piggy series and so much more) has daily drawing classes at 1 pm (EST).

Studio JJK - Author and Illustrator JJK (Lunch Lady series and so much more) has daily drawing classes at 2 pm (EST).

YOGA

Cosmic Kids Yoga - These are 15-30 minute yoga classes for kids with awesome themes (Frozen, Harry Potter, etc.)

Go Noodle - This amazing website has yoga, free movement and a lot more ways to guide your kids on getting up and moving during the bad weather days.

We’ll be back soon. Promise.

- Leah


Gray Oak Gives Back - Project Reveal (Part 2)

In today’s (long) blog post, we’re sharing the rest of our Gray Oak Gives Back transformation. We’re diving into the details of the coffee table, media center and sofa scene (with the mega grid gallery). Just like last time, we’re sharing details on our design decisions and shoppable links.

{If you missed the first half of the reveal - it’s here. And if you missed the fireplace transformation - it’s here}

Let’s start with the coffee table scene. It’s really an oversized ottoman scene. And we absolutely love it. One of the few “must haves” our client asked for was a soft surface to kick up her feet when she watched TV. She had a large ottoman in her original set up and was used to this feature.

We love the idea of ottomans in place of coffee tables, but for this project we also wanted to bring in furniture with negative space because the room is relatively small. Incorporating lots of negative space, the space around and between objects, makes a room feel airy and even bigger. The ottoman we chose, with an open wood base, was the perfect solution. And we just love the subtly patterned fabric that is neutral but still interesting.

 
Gray Oak Studio - Lowell Project Living Room
 

ottoman / rug / armchair

We styled the ottoman with some of our favorites: books, a box and a tray. We created three sections with each section having a purpose. For a deeper dive into the Rule of Three (a simple styling rule), check out THIS blog post.

9_Priscilla_Rd_121128.jpg

Coffee Table Book / Similar Box / Oval Tray

For coffee table styling in particular it’s important to make sure beauty and function are in balance. Unlike some styling surfaces (i.e. mantel, console table, bookshelf), a coffee table will be heavily used for cups, feet and a revolving array of things (a new magazine, eye glasses, etc.).

The tray is used to corral the small stuff - a favorite candle, a library book, a small plant, etc. The coffee table book is a conversation piece and a hard surface if your coffee table is actually an oversized ottoman. The box is a place to keep remotes and all the loose change you find in the cushions.

Gray+Oak+Studio+-+Coffee+Table+Styling+Tips

For the days you’re expecting company, our best tip to spruce up your coffee table scene is a bud vase and colorful flowers. They bring the happy, and make everything look a little more special and pulled together.

Ok, moving onto the media console. After much deliberation, we ultimately decided to place the media console and TV right in front of a window. It’s not a traditional choice, but in this space it works really well. And with the light colored wall (Balboa Mist by Benjamin Moore) and the airy drapes pulled close, you might not have realized it.

Here’s why we landed on this layout choice:

1) There was no wall for the TV. You can quick peek at our original Gray Oak Gives Back post to see an aerial view of the room layout - every wall has a window, fireplace or door with the exception of the wall that we placed the sofa. We like a sofa facing a TV where the primary use of the room is TV watching (makes sense), so the fireplace wall was the only option for the TV.

Now, you may wonder why we didn’t put the TV over the fireplace. Well, the rumor about interior designers not liking TVs above fireplaces is 100% true. Televisions above fireplaces are a last resort for two reasons. First, as a general rule, the middle of your TV should be approximately 55” off the ground (this isn’t an exact formula - the size of your TV and the distance that you’re watching are important factors). The height of the average mantel would put the average television way too high. Second, a fireplace is a natural and beautiful focal point of a room, which (ideally) shouldn’t be diminished by a big, black box.

2) This particular window was a good option to block because it faces a small side yard and the neighboring house. It isn’t visible from the street (we didn’t have to worry about curb appeal) and it isn’t visible from the backyard (again, an eyesore if you spend a lot of time in your backyard).

3) There is plenty of light in this room (windows on 3 different walls), so partially blocking some natural light doesn’t have any impact on the look or feel of the room as a whole.

Gray Oak Studio - Gives Back 2019 - Living Room Transformation

In terms of the media console itself, this piece adds warmth to a cooler palette (blues and grays are cool colors) and is in the modern farmhouse style our client loves. We also like that it has a mix of open and hidden storage. Finally, it’s a low profile piece in terms of short (blocking the least amount of window possible) and narrow (staying mostly in line with the depth of the fireplace).

Gray Oak Studio - Gives Back 2019 - TV in front of window

Media Console /Oversized Woven Tray (under ottoman) / Similar White Vase (left of TV)

Next, we turn to the sofa. The sofa we chose for this project has a beautiful, versatile style and is incredibly comfortable. When it comes to picking a sofa, the biggest piece of advice we give during our Designer for a Day consultations is to splurge because more money equates more quality (to a point). We could go nutty talking about the levels of sofa quality - kiln dried wood for the frame, 8 way hand-tied springs, channeled down wrapped cushions, the hand and rub count of fabric, etc. The important tip here is that a high quality sofa is insanely comfortable and will last a couple decades while a poor quality sofa will be terribly uncomfortable and need to be replaced in 5 years.

Gray Oak Studio - Gives Back 2019 - Living Room Transformation

Sofa / Floor Lamp / Similar Blue Table Lamp

Above the sofa, we created a big gallery wall. This is a large space and a great opportunity to bring character and interest to the room. Large scale art is gorgeous, but it’s also very pricey. A gallery of smaller frames is a great way to fill a big space without having to splurge and without having to commit to one piece of art.

A clean grid formation is an easy approach if you’re intimated by gallery walls. We also recommend these frames because they’re incredibly light weight and we were able to hang them using command strip velcro. When you use velcro strips you can take the frames off and make micro adjustments to get clean separation lines.

Gray Oak Studio - Gives Back - Gallery Wall in Living Room

The last vignette in the room to share is this sweet, tiered side table. We love the soft curves, two shelves and warm tone. It also falls into the “save” (opposite of splurge) category, which is always nice.

Gray Oak Studio - Gives Back 2019 - Side Table in Living Room

Side Table / Gallery Frames / Similar Pillow

And that is that! If there are any elements of the room you want to know more about that we missed, just let us know and we’ll be sure to follow-up. This project came to life because we met a special mom with a special daughter fighting a rare disease. Learn more about their fight and this transformation in a wonderful article written by a local magazine.

As always, thanks for following along!

- Leah

All Your Install Day Questions...Answered

Right before our most recent Install Day, we asked our Instagram followers for any and all of their Install Day questions. And today we’re sharing some of those questions and, of course, our answers. But, first, we thought it might be helpful to give you a brief rundown of what exactly Install Day is.

Ahhh…the mystical Install Day! Install Day is the day we complete a full service interior design project. Our client’s room starts the day either completely empty or full of old furniture. When our client returns home at the end of the day, the room is totally transformed with new furnishings and decor.

start of the day

(aka BEFORE)

end of the day

(aka AFTER)

Side Note: Technically, any part of a transformation that involves a tradesperson are done before Install Day. For the project above, fresh paint on the walls, new window treatments (not pictured), a new light fixture and some carpentry work on an existing built-in bookcase (not pictured) were completed in advance of Install Day.

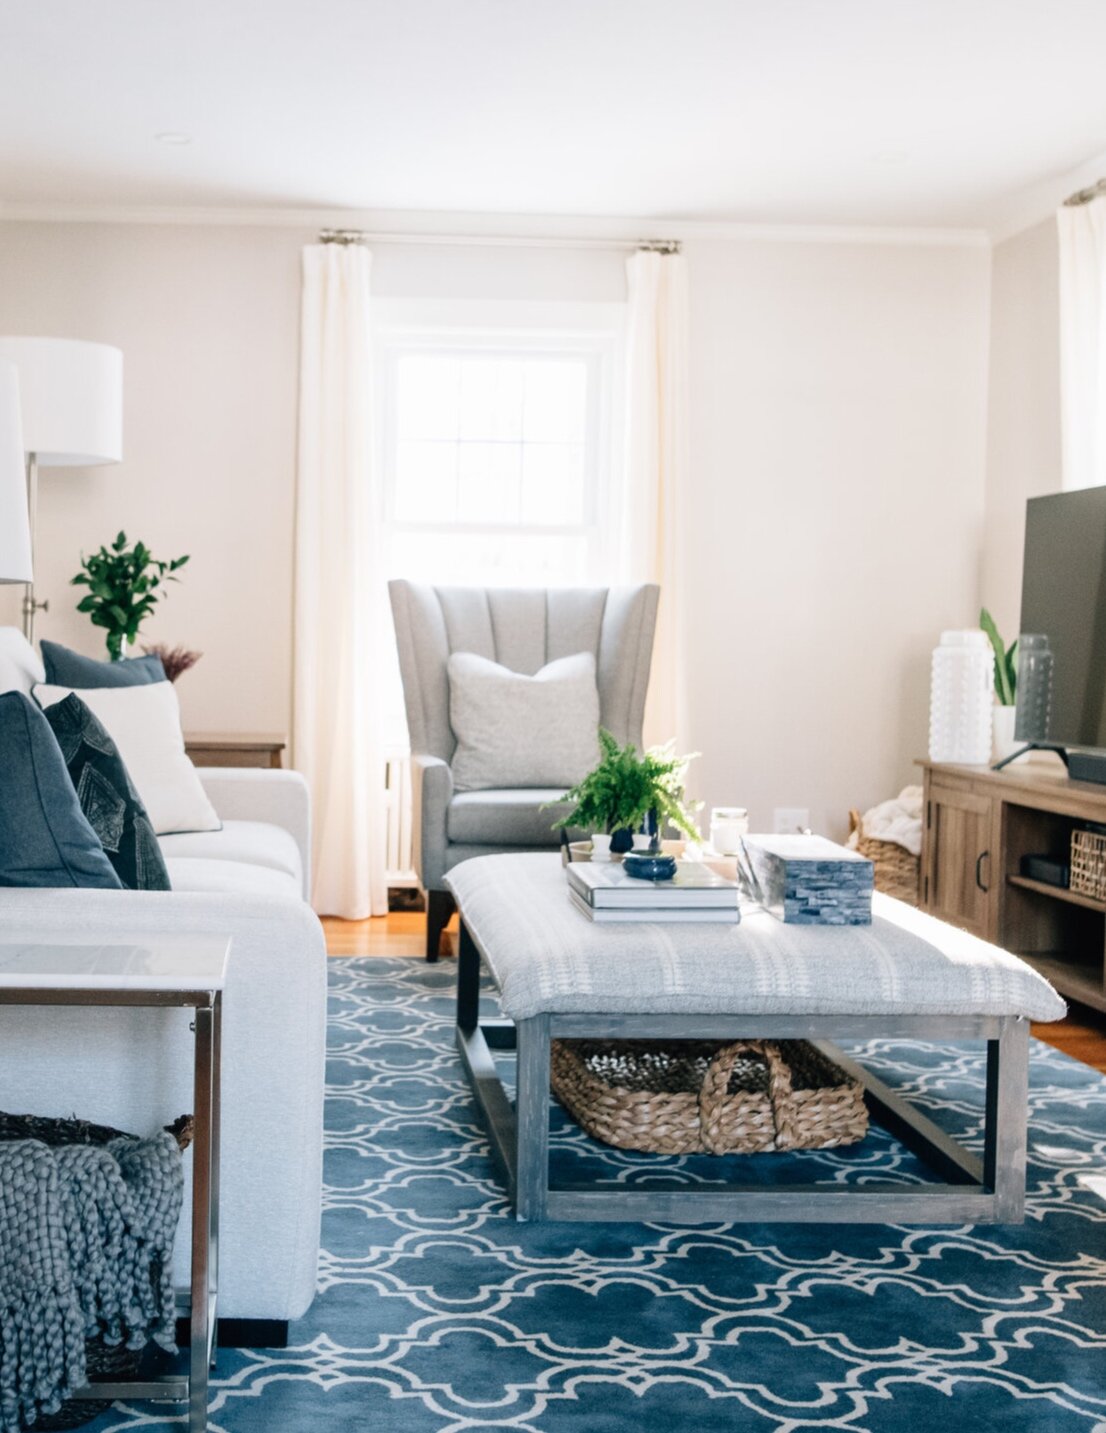
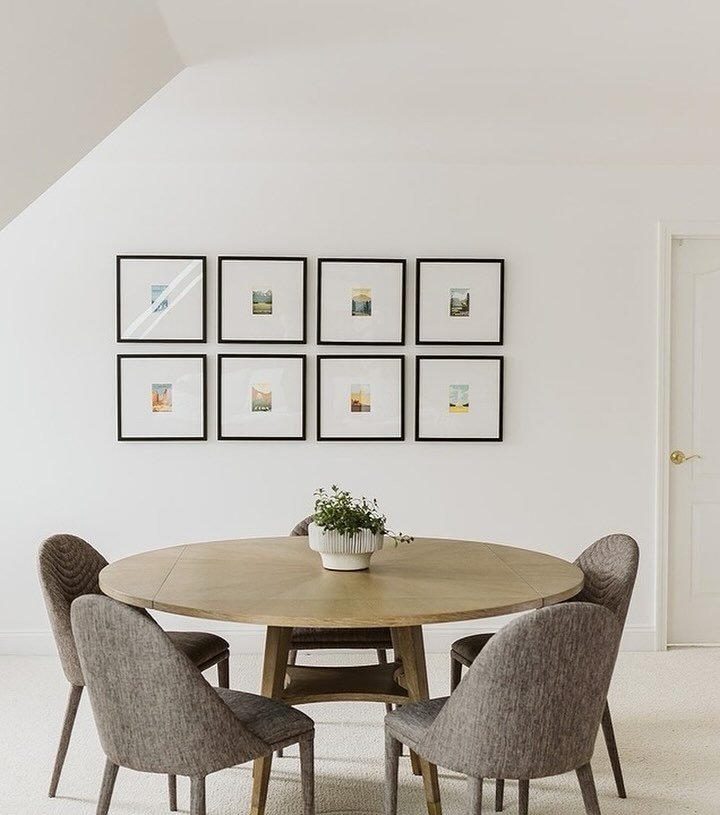
Install Day officially kicks off when our movers deliver all the new furniture. Rugs and rug pads are placed, sofas are moved 2 inches to the right then 1 inch to the left…then back again (our movers are extremely patient), tables are centered, and armchairs are carefully nudged into their nooks. Next, we bring in all the decor. Decor includes everything from indoor trees to lamps. For the next several/many hours, with the help of a handyman and design assistant, mirrors and art are hung, plants are potted, pillows are fluffed and placed, and bookshelves are styled. At last, our client comes home to their new favorite place.

Sounds pretty awesome right? Just like some of your favorite HGTV shows?!? It really is.

And now for the questions:

“Hi Ladies! So you group (decor) by category? Do you also breakdown by room? Love seeing your install day process!”

Gray Oak Answer - After all our decor is brought into the home, we unpack and sort everything by the type of decor: baskets, books, trays, lamps, vases, planters and plants, boxes, objects, etc. And sometimes we’ll further separate categories, for example wire baskets versus woven baskets. The process remains the same whether we’re doing a one room install or multi-room room. However, we have a general decor plan for each room (and each area within a room - i.e. the coffee table plan, the mantel plan, etc.), so certain key pieces will be flagged to go into each room from the getgo and then the remainder of the categorized items act as filler.

We have found that grouping similar decor allows us to work more efficiently. As we’re styling, we know what type of decor we want, it’s usually just a matter of finding the right item within the category. For example, we want a tray on an oversized ottoman. We look through all our trays, try several out, pick the winner and move on.

“So do you guys install everything and give the client a list and invoice and let them figure out if they don’t want any of it to stay?”

Gray Oak Answer - During our creative presentation (check out details on our process here), we present our clients with a proposal for cost of all materials. This proposal breaks down our clients budget by item (i.e. sofa - $2,000, rug - $1,000, etc.). In this proposal, we include a line item for decor. The proposal for cost of all materials is approved by our client before any purchases are made. Then, when Install Day comes, we have a clear budget to use toward decor. While our clients are able to return any decor after Install Day, in truth, they don’t! The cost is already understood and the decor is tailored to the design plan they approved.

“How you decide what goes where. Do you do many tries before you know it’s right?”

Gray Oak Answer - This is a tricky one! Not because we don’t want to reveal our styling secrets, but because a lot of it is indescribable…the result of instinct. We definitely consider design pillars like negative space, balance, contrast and repetition. But, there is also a lot of try this and try that. (See the last question for our plan on how to share more styling tips)

Hence, we bring about 5 times the amount of decor we use! If you’ve watched any of our behind the scenes videos on Instagram stories during an Install Day, you’ve seen just how much decor this equals. A Lot. Seeing different pieces and creating different combinations onsite is the best way to find the perfect mix.

This process is a huge reason why our clients love when we style - we’re thorough and meticulous in making sure that a room looks and feels like home. Without the plants, vases, trays and books, a beautifully furnished room can feel cold. It’s the details that really bring a space to life.

“Hanging curtains pls - I need tips!”

Gray Oak Answer - We have a lot of good tips for curtains! First, we recommend using curtain rings (like these). They make opening and closing curtains smooth and easy (no pulling, tugging…yanking!), and they add length. The average ceiling height of many older New England homes is 7.5’ (90”) to 8’ (96”). But the average length of an out-of-the-box curtain is 84” or 96” or 108”. This means that 84” is too short, 96” is too long and 108” is way too long. By using an 84” curtain and adding an extra 2”-3” between the length of the curtain ring and the curtain rod, you’re able to raise your curtain rods closer to the ceiling, which is ideal. The general rule of thumb for hanging curtain rods is high and wide. Go as close to the ceiling as possible and far enough out so the curtain doesn’t cover any of the window when it’s open.

We also recommend “training” your curtains. This means to create folds (knife pleats) starting at the location of each ring and carry that fold to the bottom of the curtain. Then tie the hand pleated curtain together with a piece of yarn or twine. After about 2 days, untie and you will have a beautiful, pleated curtain that’s clean and crisp without being old school (aka pinch pleat, etc.).

“Maybe (show) different options styled and then the one you decide on? Fun!”

Gray Oak Answer - This follower wanted us to post different styling options for a vignette, to give a range of ideas on how it could look. And one day…we will…probably… We just love this idea, but have found that the time constraints we have during an actual Install Day have, thus far, prevented us from doing so.

Install Day is such an intense process because we want everything to look absolutely perfect and we want it to be done for our clients to come home at a reasonable time (our clients are out of the house while Install Day is underway). We know, however, that styling is hard and confusing and time consuming - and so every piece of advice to make it less so is coveted! With that, we would love to collect questions about our styling process - get as specific as you’d like - and we’ll dedicate a blog post on all the styling tips and tricks we have! So, leave a comment here, DM us, email us (hello@grayoakstudio.com) and we promise we’ll answer them all!

Have a wonderful week.

- Leah