Gallery Wall Roundup
/Many of our interior design clients request the highly coveted gallery wall. And we get it - they’re beautiful. They bring so much character and interest into a room. The flip of that design power is that they’re quite time consuming to create. First, and probably most time consuming, is to find the right art. Then, the perfect frames. Last, the magical configuration. Oh, and then hanging it up without making too many extra/accident holes. The sheer amount of time is one of the key reasons we only offer gallery wall creations to our Full Service package clients.
So, while we can’t offer you an actual gallery wall plan (unless you want to inquire about our Full Service Interior Design package in which case we would love to!), we can offer you lots of inspiration to make it happen on your own. Today we have a round-up of gallery walls we’ve created. We’ve designed and installed all different styles of galleries and all different styles of art. We love that you can get a feel for the Client just by scanning through the gallery.
Gray Oak Gives Back Project
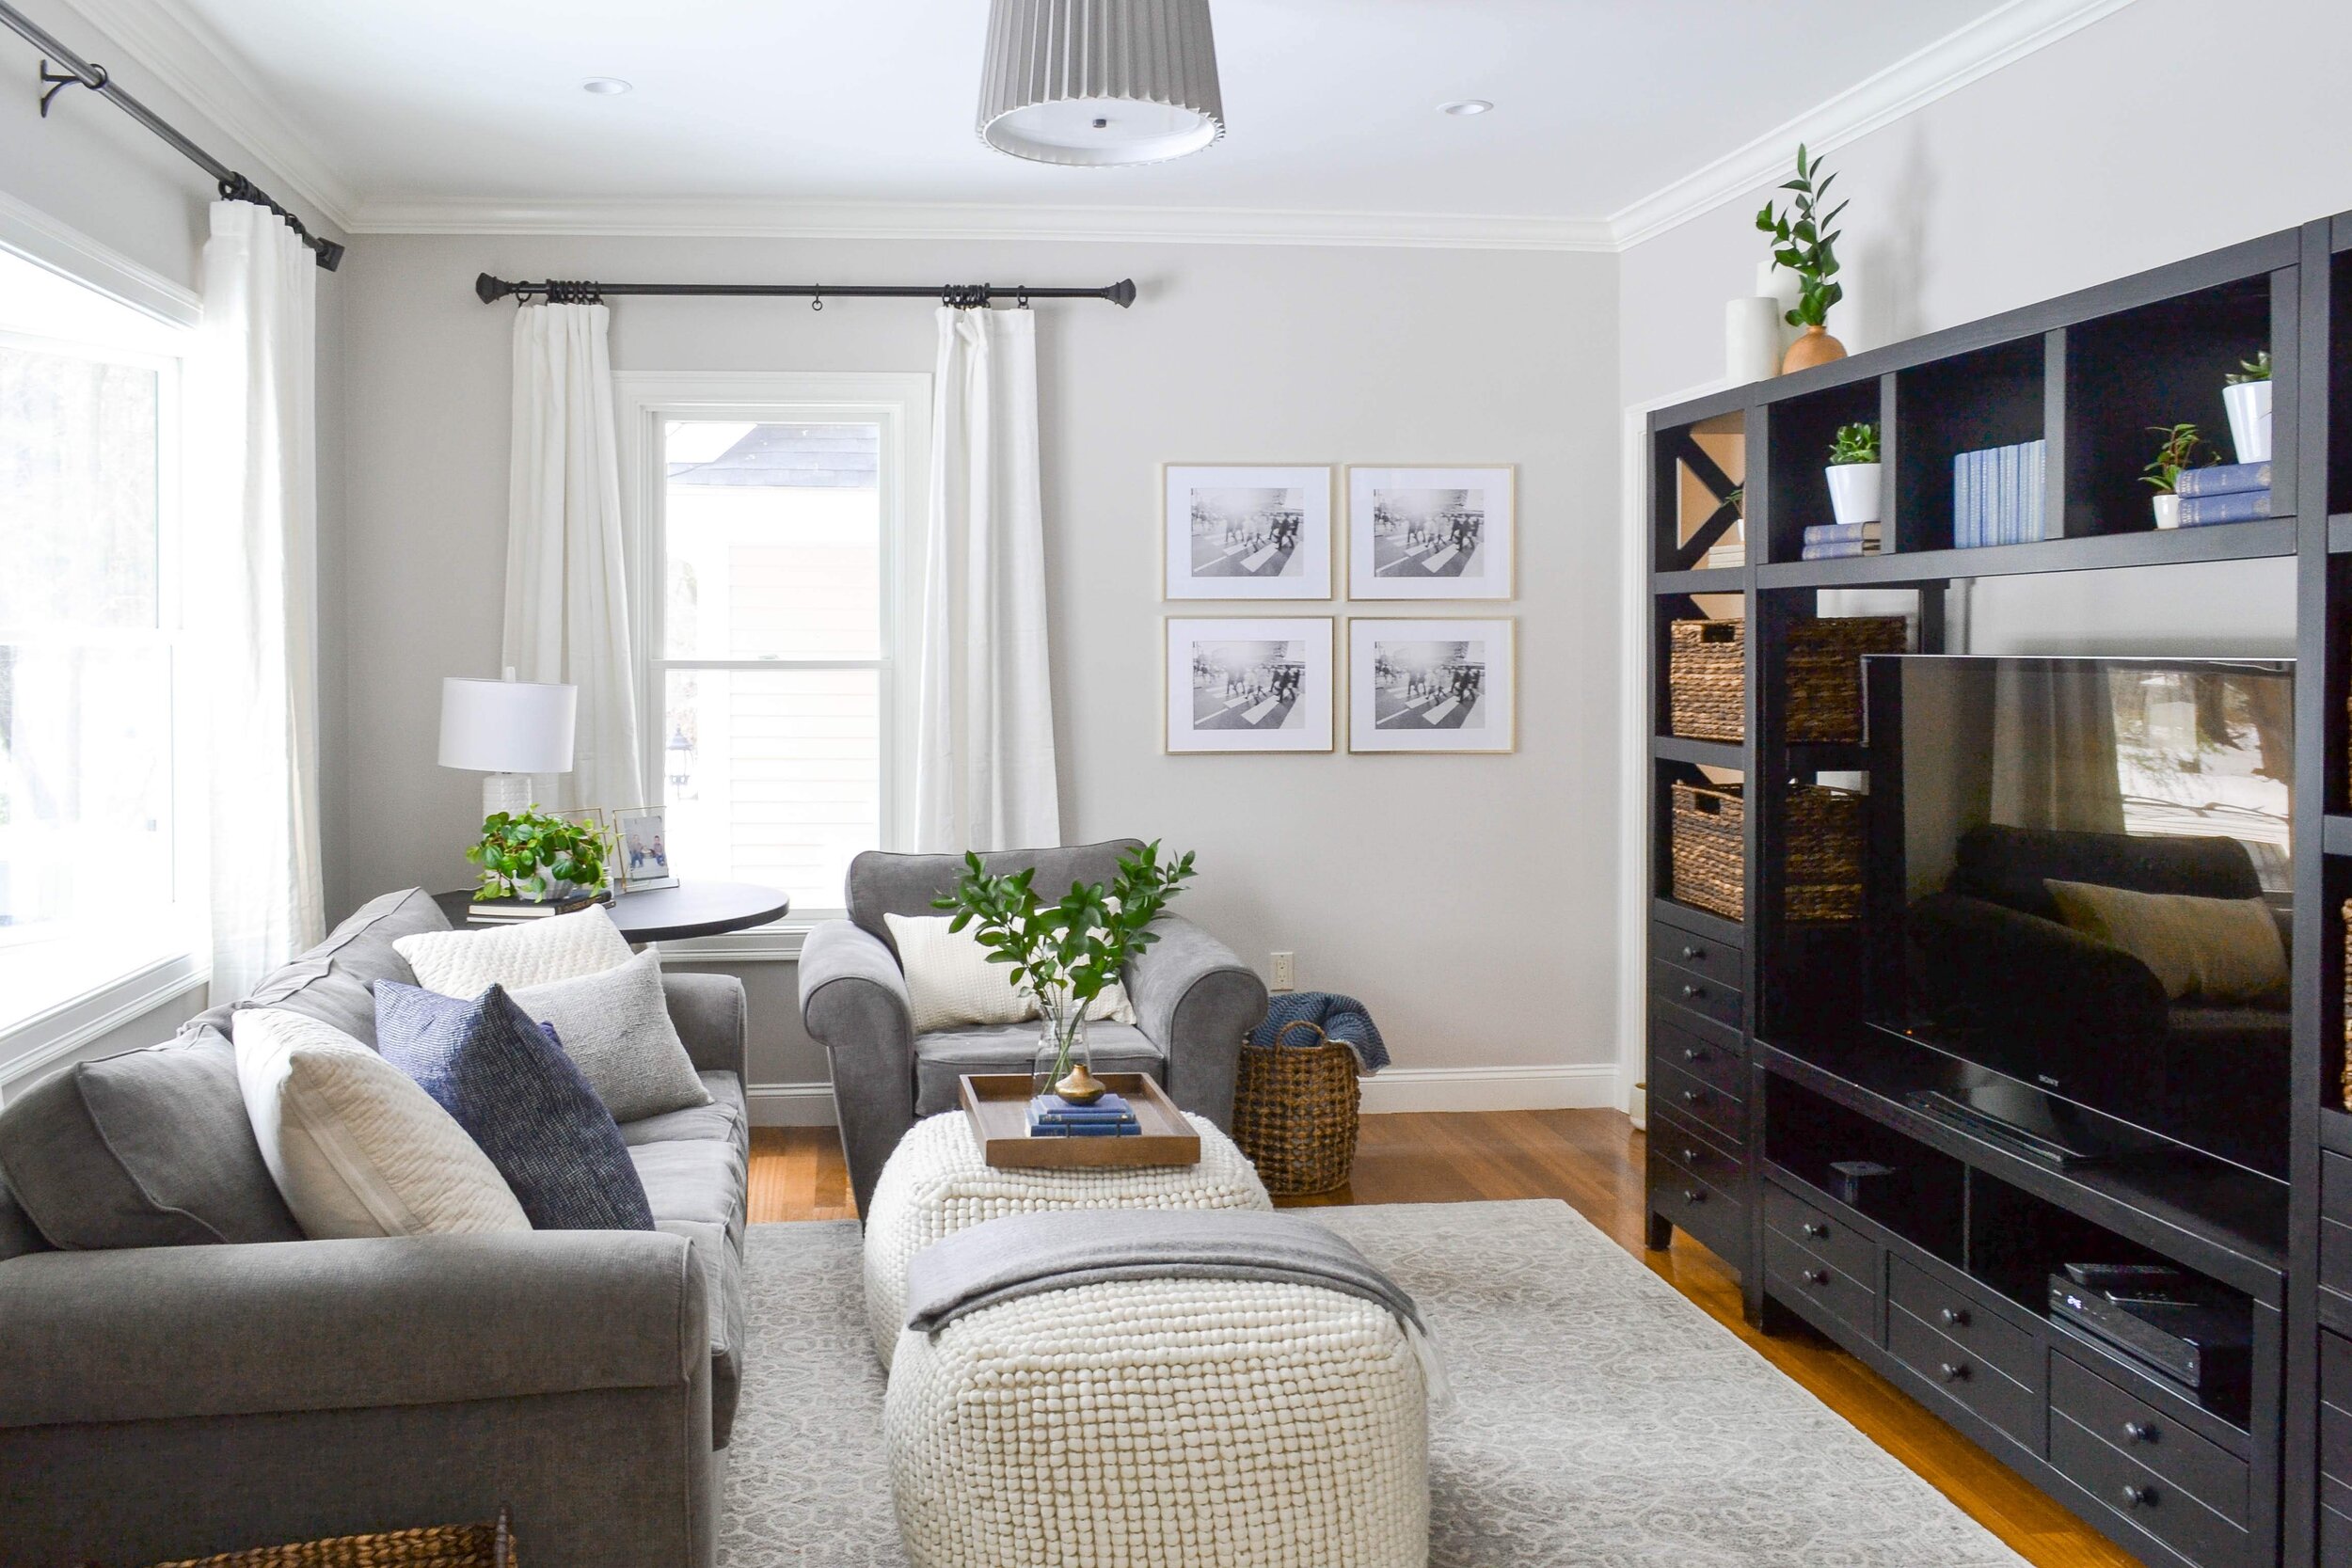
This 15 frame grid gallery is from our Gray Oak Gives Back Project. A simple grid of matching frames filled with stock black and white photos. These photos can be easily replaced by family photos or more curated landscape photos or a series of abstracts. But they’re beautiful as is. (For sources on all things Gray Oak Gives Back head to the project reveal post)
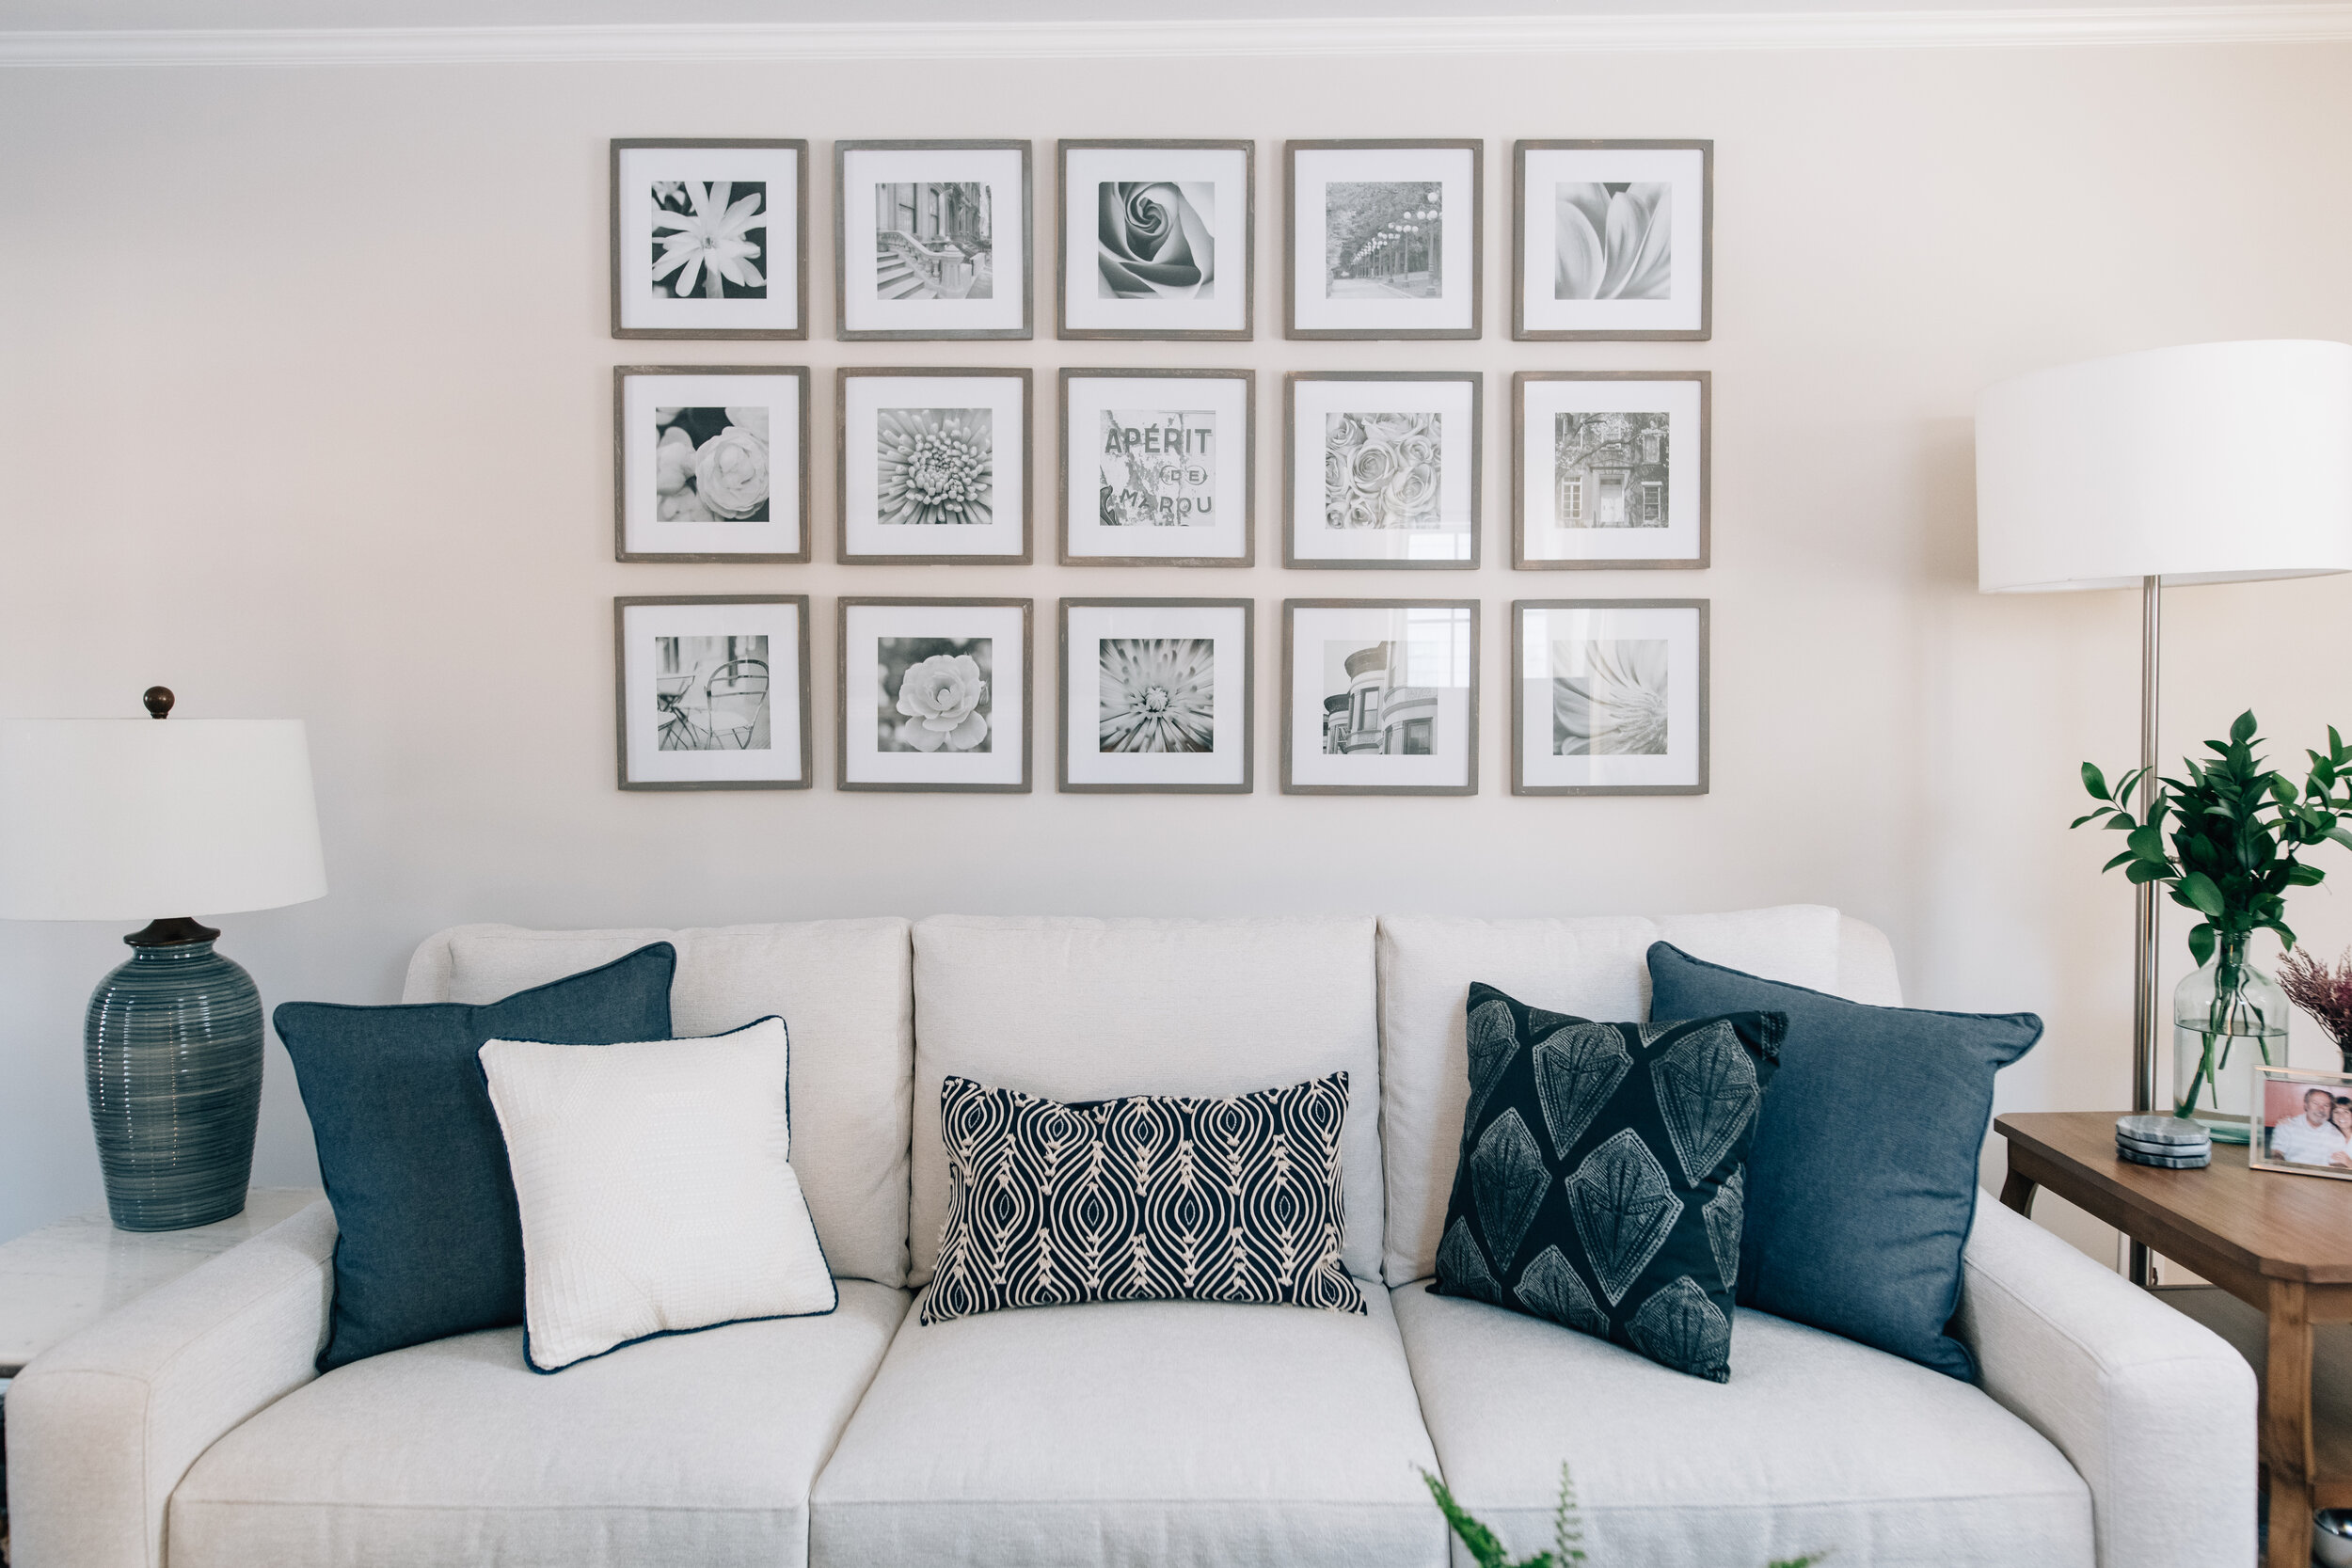
Gray Oak Gives Back Project - Design by Gray Oak Studio
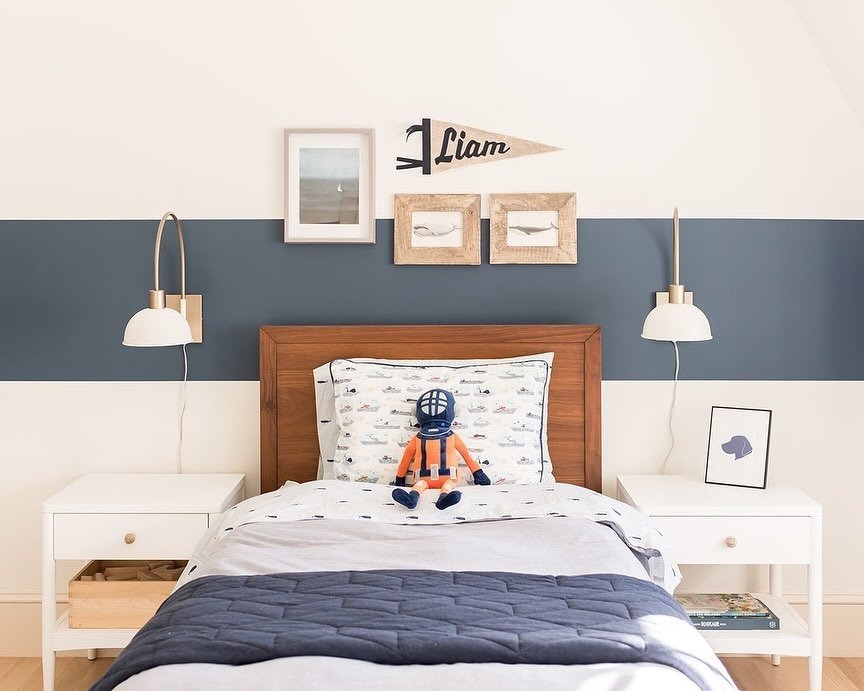
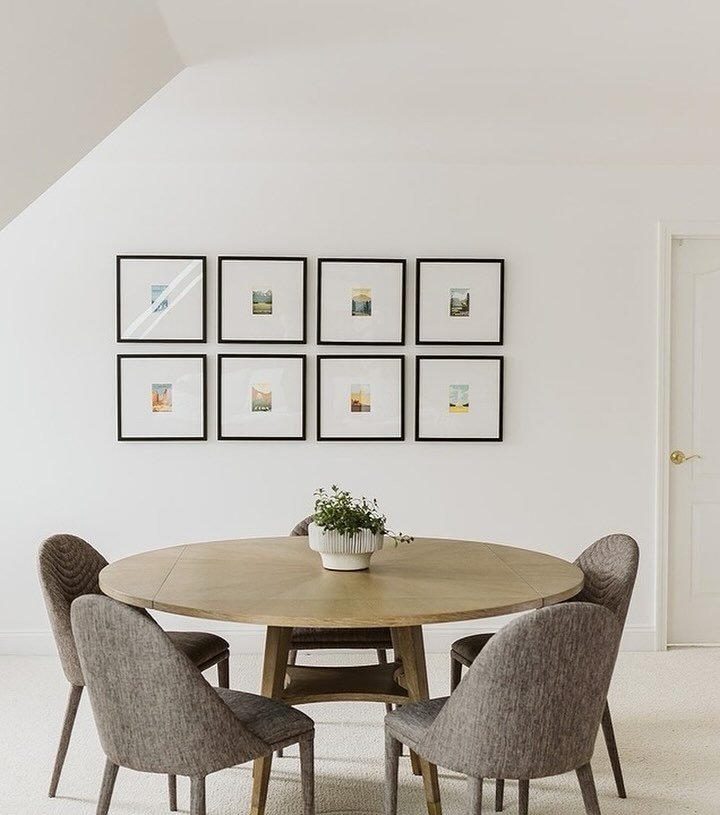
Prospect Project
This gallery is from our Prospect Project. If you guessed that the occupant of this room is under 10 years old, you guessed correctly. We love how the 3-dimensional elements of this gallery add to the whimsy.
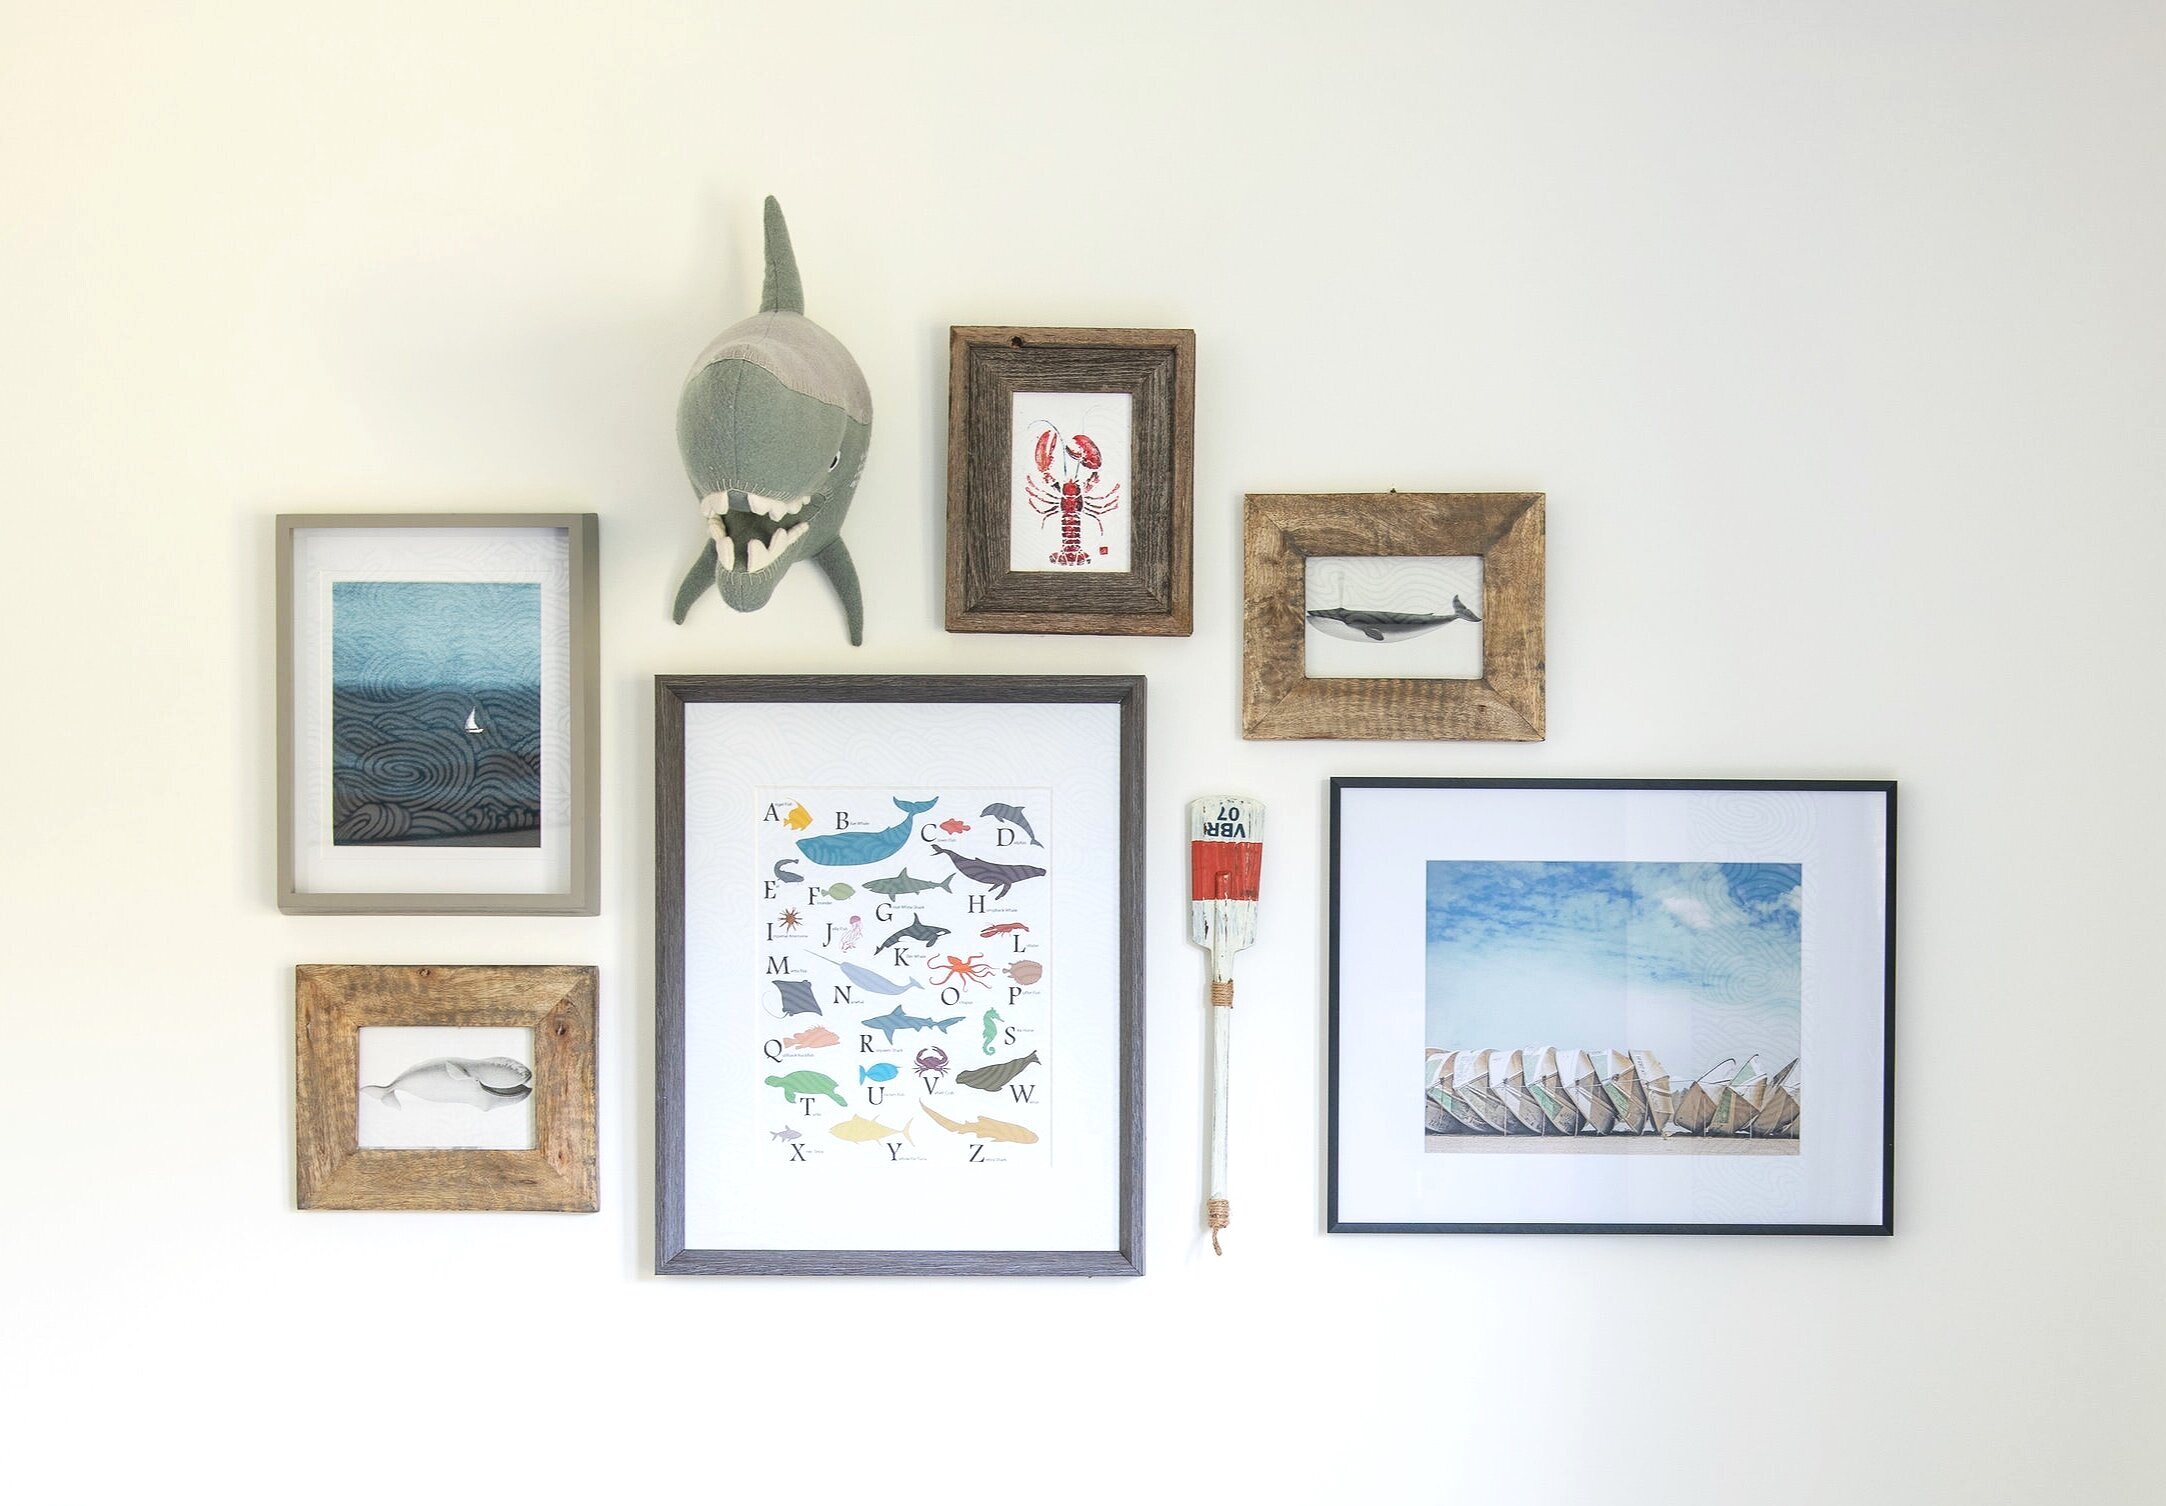
Prospect Project - Design by Gray Oak Studio
Pearl Project
In both our Pearl Project and our Hutchins Project, we used a simple grid of 4 identical frames to create a gallery moment. This is a really great starter gallery if the big guys seem intimidating. For the Pearl Street Project, we simply clustered a series of pieces our Client already owned. Bringing them into a small gallery made them more of a focal point - the same effect as one large scale piece of art (but way less expensive!).
Pearl Project - Design by Gray Oak Studio
Hutchins Project
For our Hutchins Project, we created a gallery wall of frames ready for our Client to fill with family photos. Incorporating family photos in a modern, clean way was the goal.
Hutchins Project - Design by Gray Oak Studio
Homestead Project
This next gallery was from one of our very first projects, which was the second phase of a project for our very first Client. Needless to say, it holds a special place for us. Our Client had these beautiful, vintage, professionally framed family heirlooms that she wanted to display but always felt that they looked out of place in her more transitional (modern) home. By mixing in a series of round brass frames (very current and clean), we were able to bridge the feeling between vintage and modern and make it feel like a cohesive thought.

Homestead Project - Design by Gray Oak Studio
Lovell Project
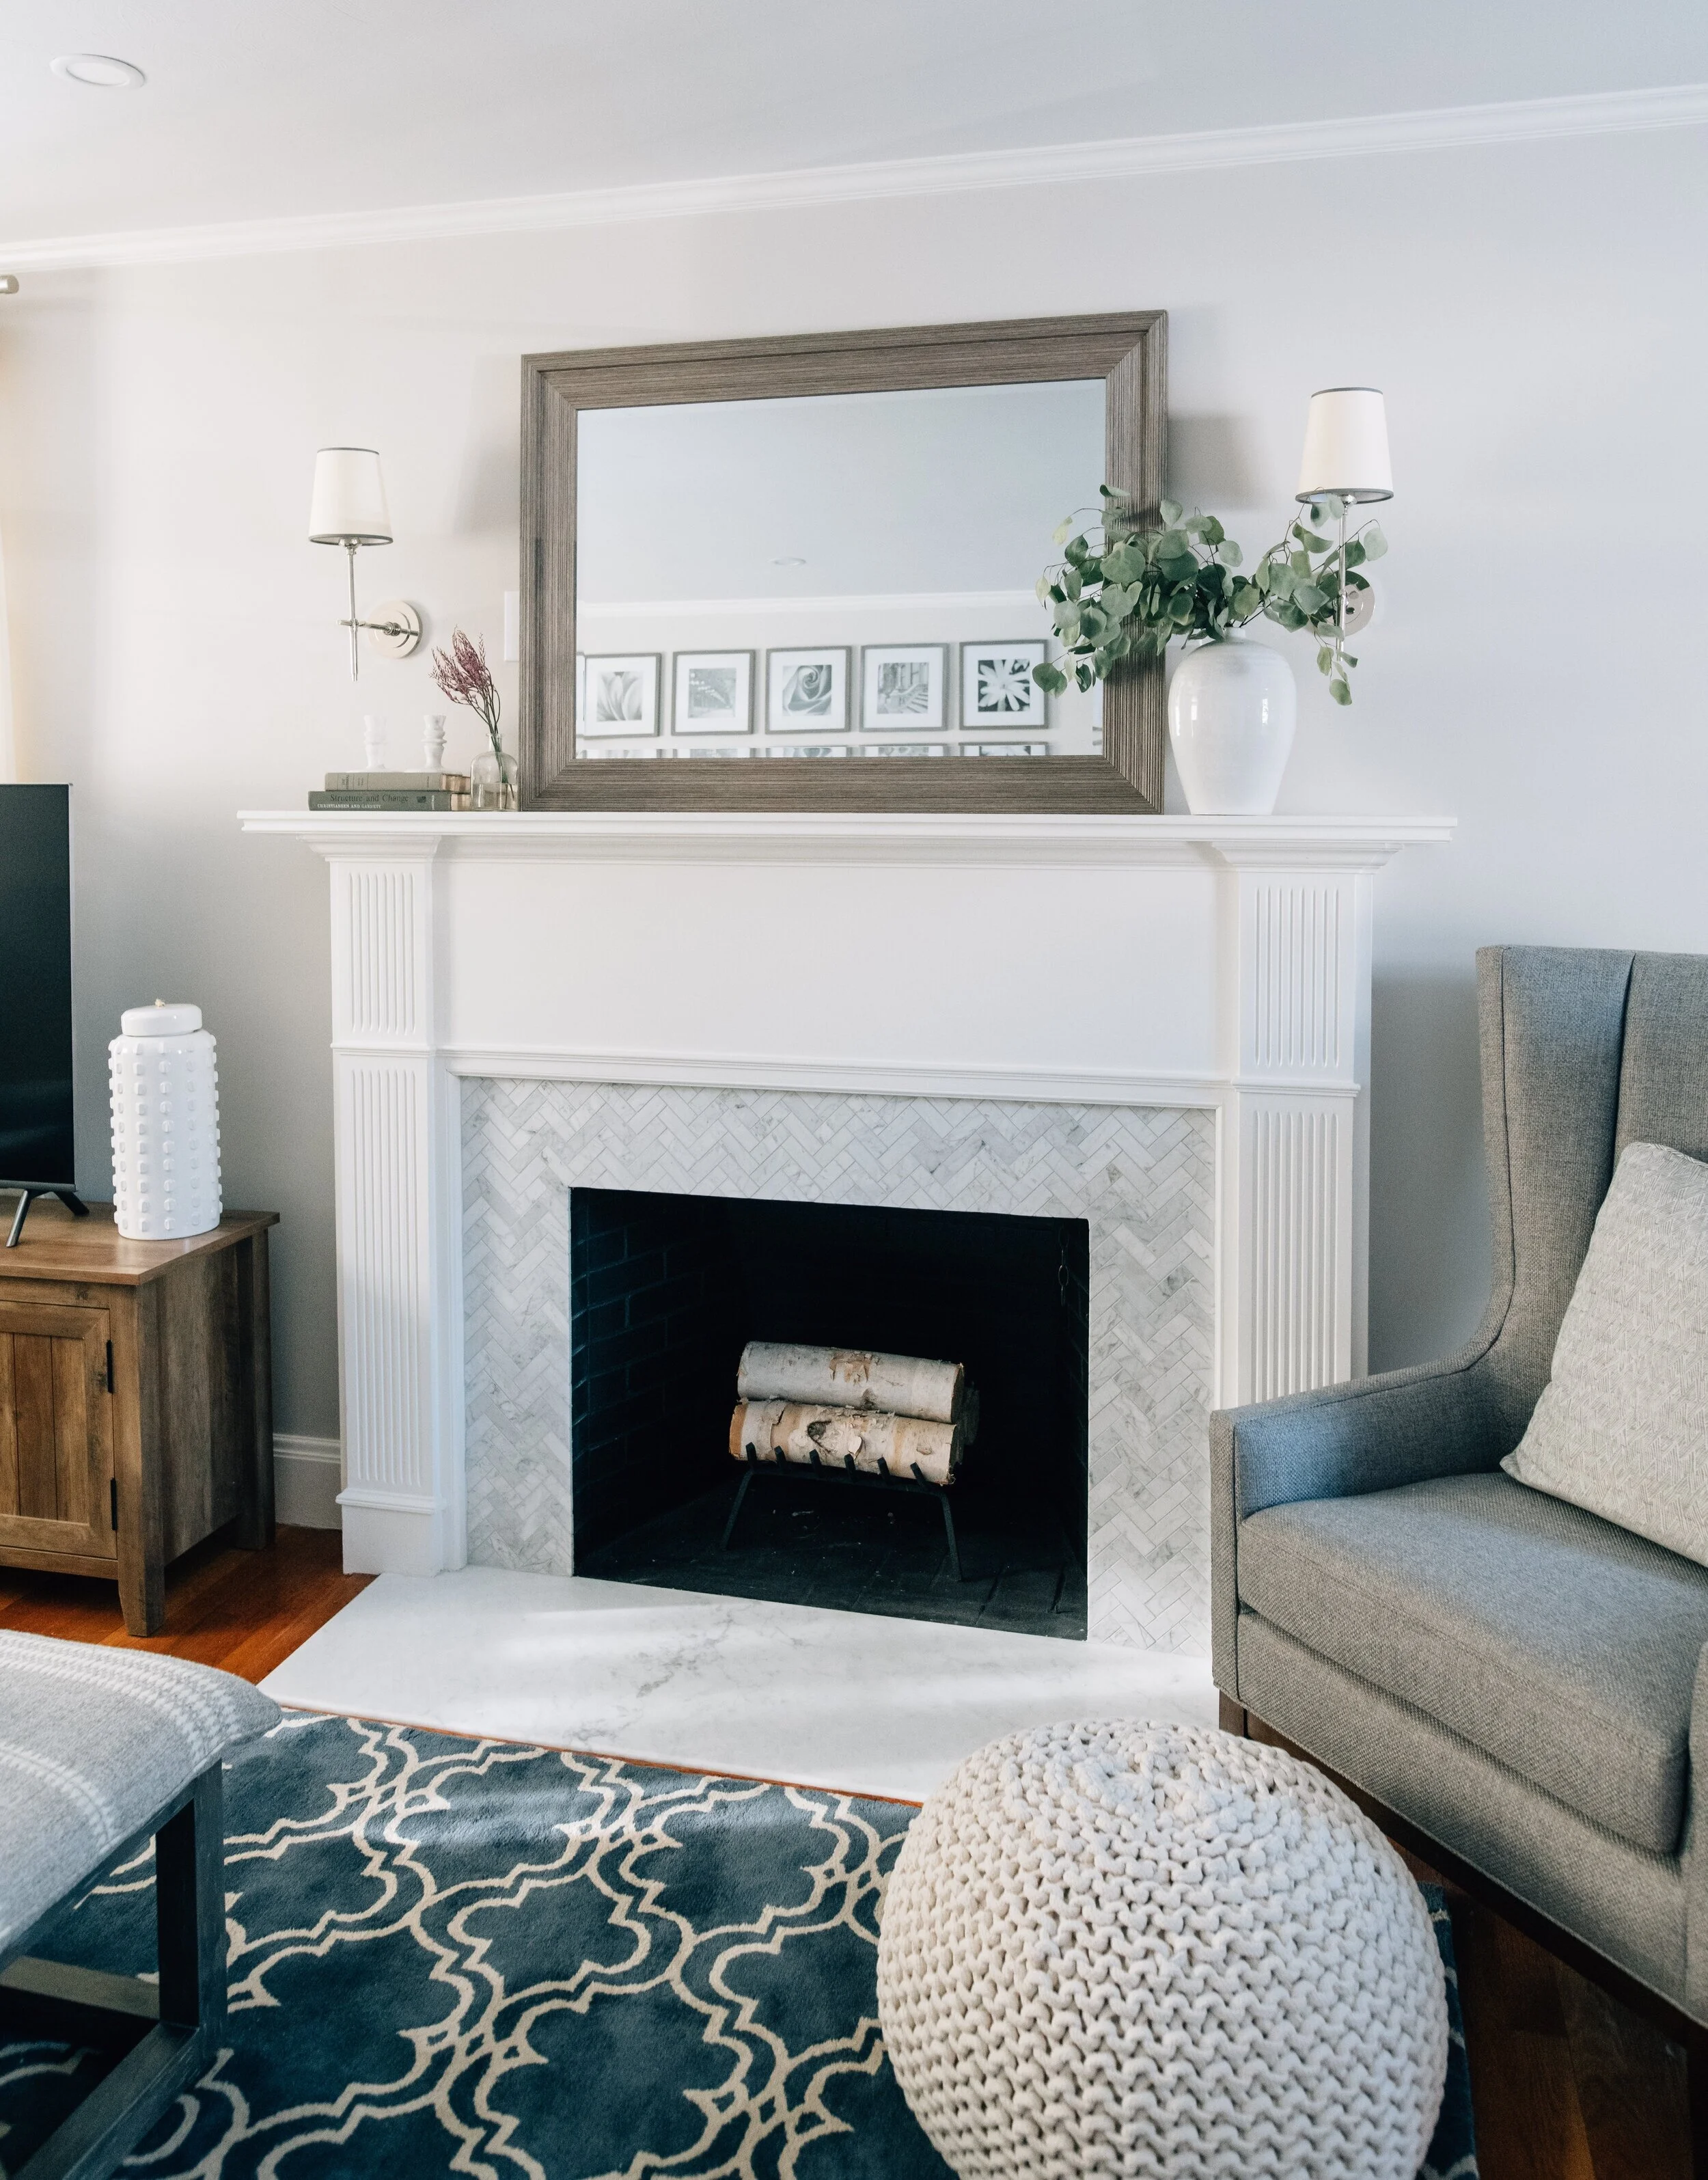
Our last mini gallery is one of our favorite and probably our most shared/coveted/revered. It’s from our Lovell Project and it’s a good one. The key here was choosing one large anchoring piece and two complimentary, smaller pieces. When creating an eclectic gallery, it’s important to mix and match the size of the frames, the material of frames and the size of the mats (some frames with mats, some without, some with oversized mats).

Lovel Project - Design by Gray Oak Studio
Hope you’re feeling inspired to get started on the gallery wall you’ve been imagining.
Have a wonderful rest of your week.
- Leah