Leah's Kid's Bathroom: Volume 2

Let me reintroduce you to my kids' bathroom. I originally introduced you a couple weeks ago and this is about where we left off... 


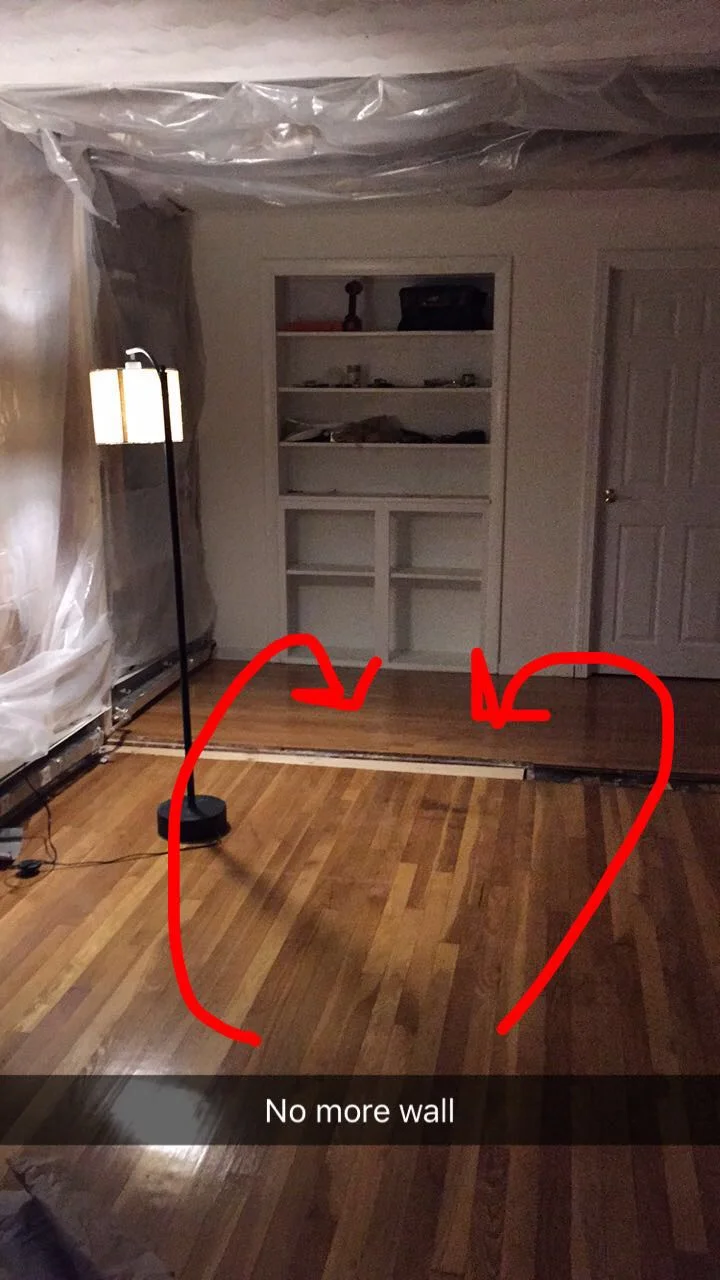
Not pretty. Not even a bathroom. After explaining the evolution of my dream, the layout change and finally the big wall removal/header install, I left you with this...

 
IMG_5937 (1).JPG
 

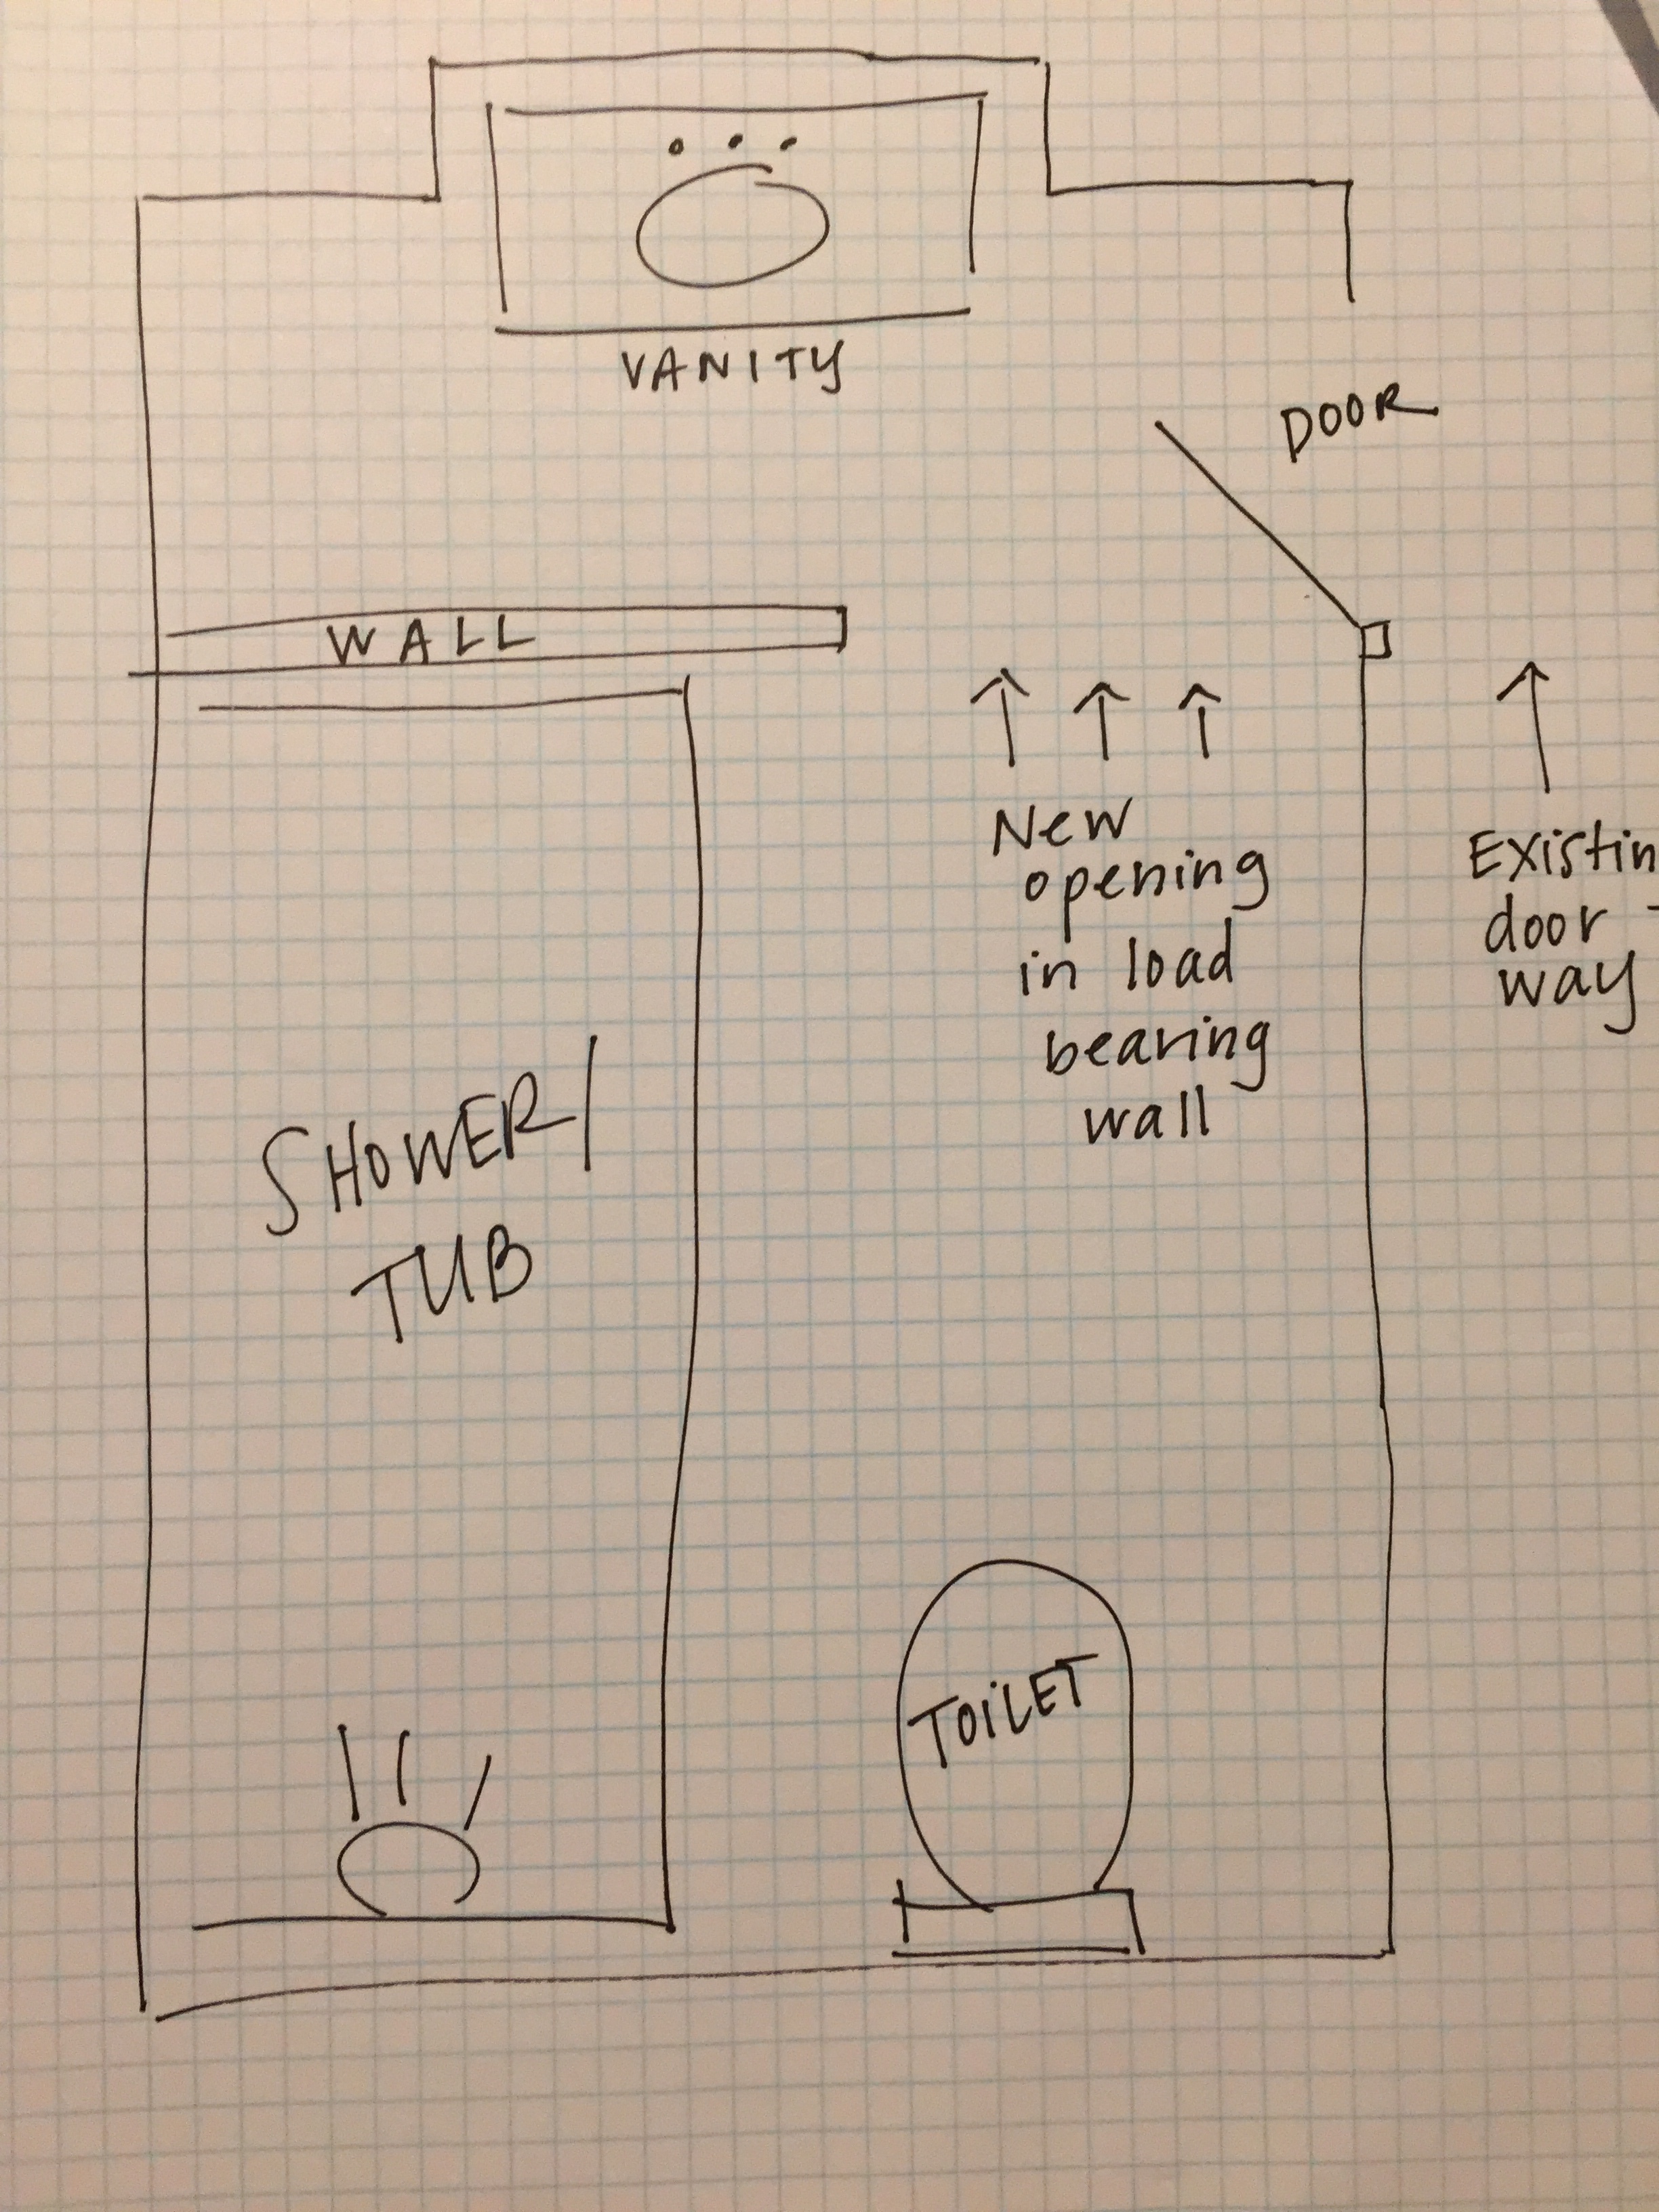
Once the wall went down, the layout truly solidified. The bathroom would be bigger than we hoped and we would have plenty of room for a big linen closet and extra wide hallways. Epic. 

Demo began in late October 2016. This was a weekend warrior project, so you can imagine how many weekends just demo, wall removal and header install took. (Hint: SO many) And then we had a forced break for the holidays - Thanksgiving and Christmas. Things took off to a slow start in the new year and by mid March 2017, we were back in business.

We fully framed the bathroom and linen closet and drywalled the exterior walls.

Here's a side-by-side of the old view (The Nook) and the new view. 

This is what I called the Scary/Frightening/Horrifying Phase of the project.

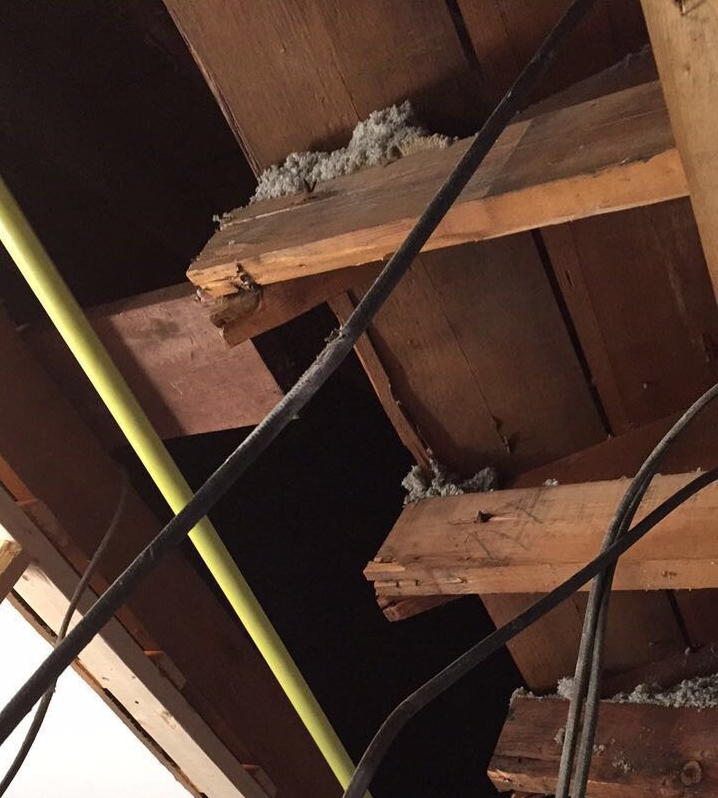
When we took down the wall between Nowhere and The Nook, and installed the header, it was amazing. The sense of accomplishment was enormous and the impact was immediate and fantastic. But 4 months later, it felt like we'd barely moved forward and the center of our house looked like a construction site. This phase brought a sense of "We are in too deep to turn back and we have so much more to do!!!". A sense of "WHAT HAVE WE DONE?!!!!" 

DSC_0804.jpg

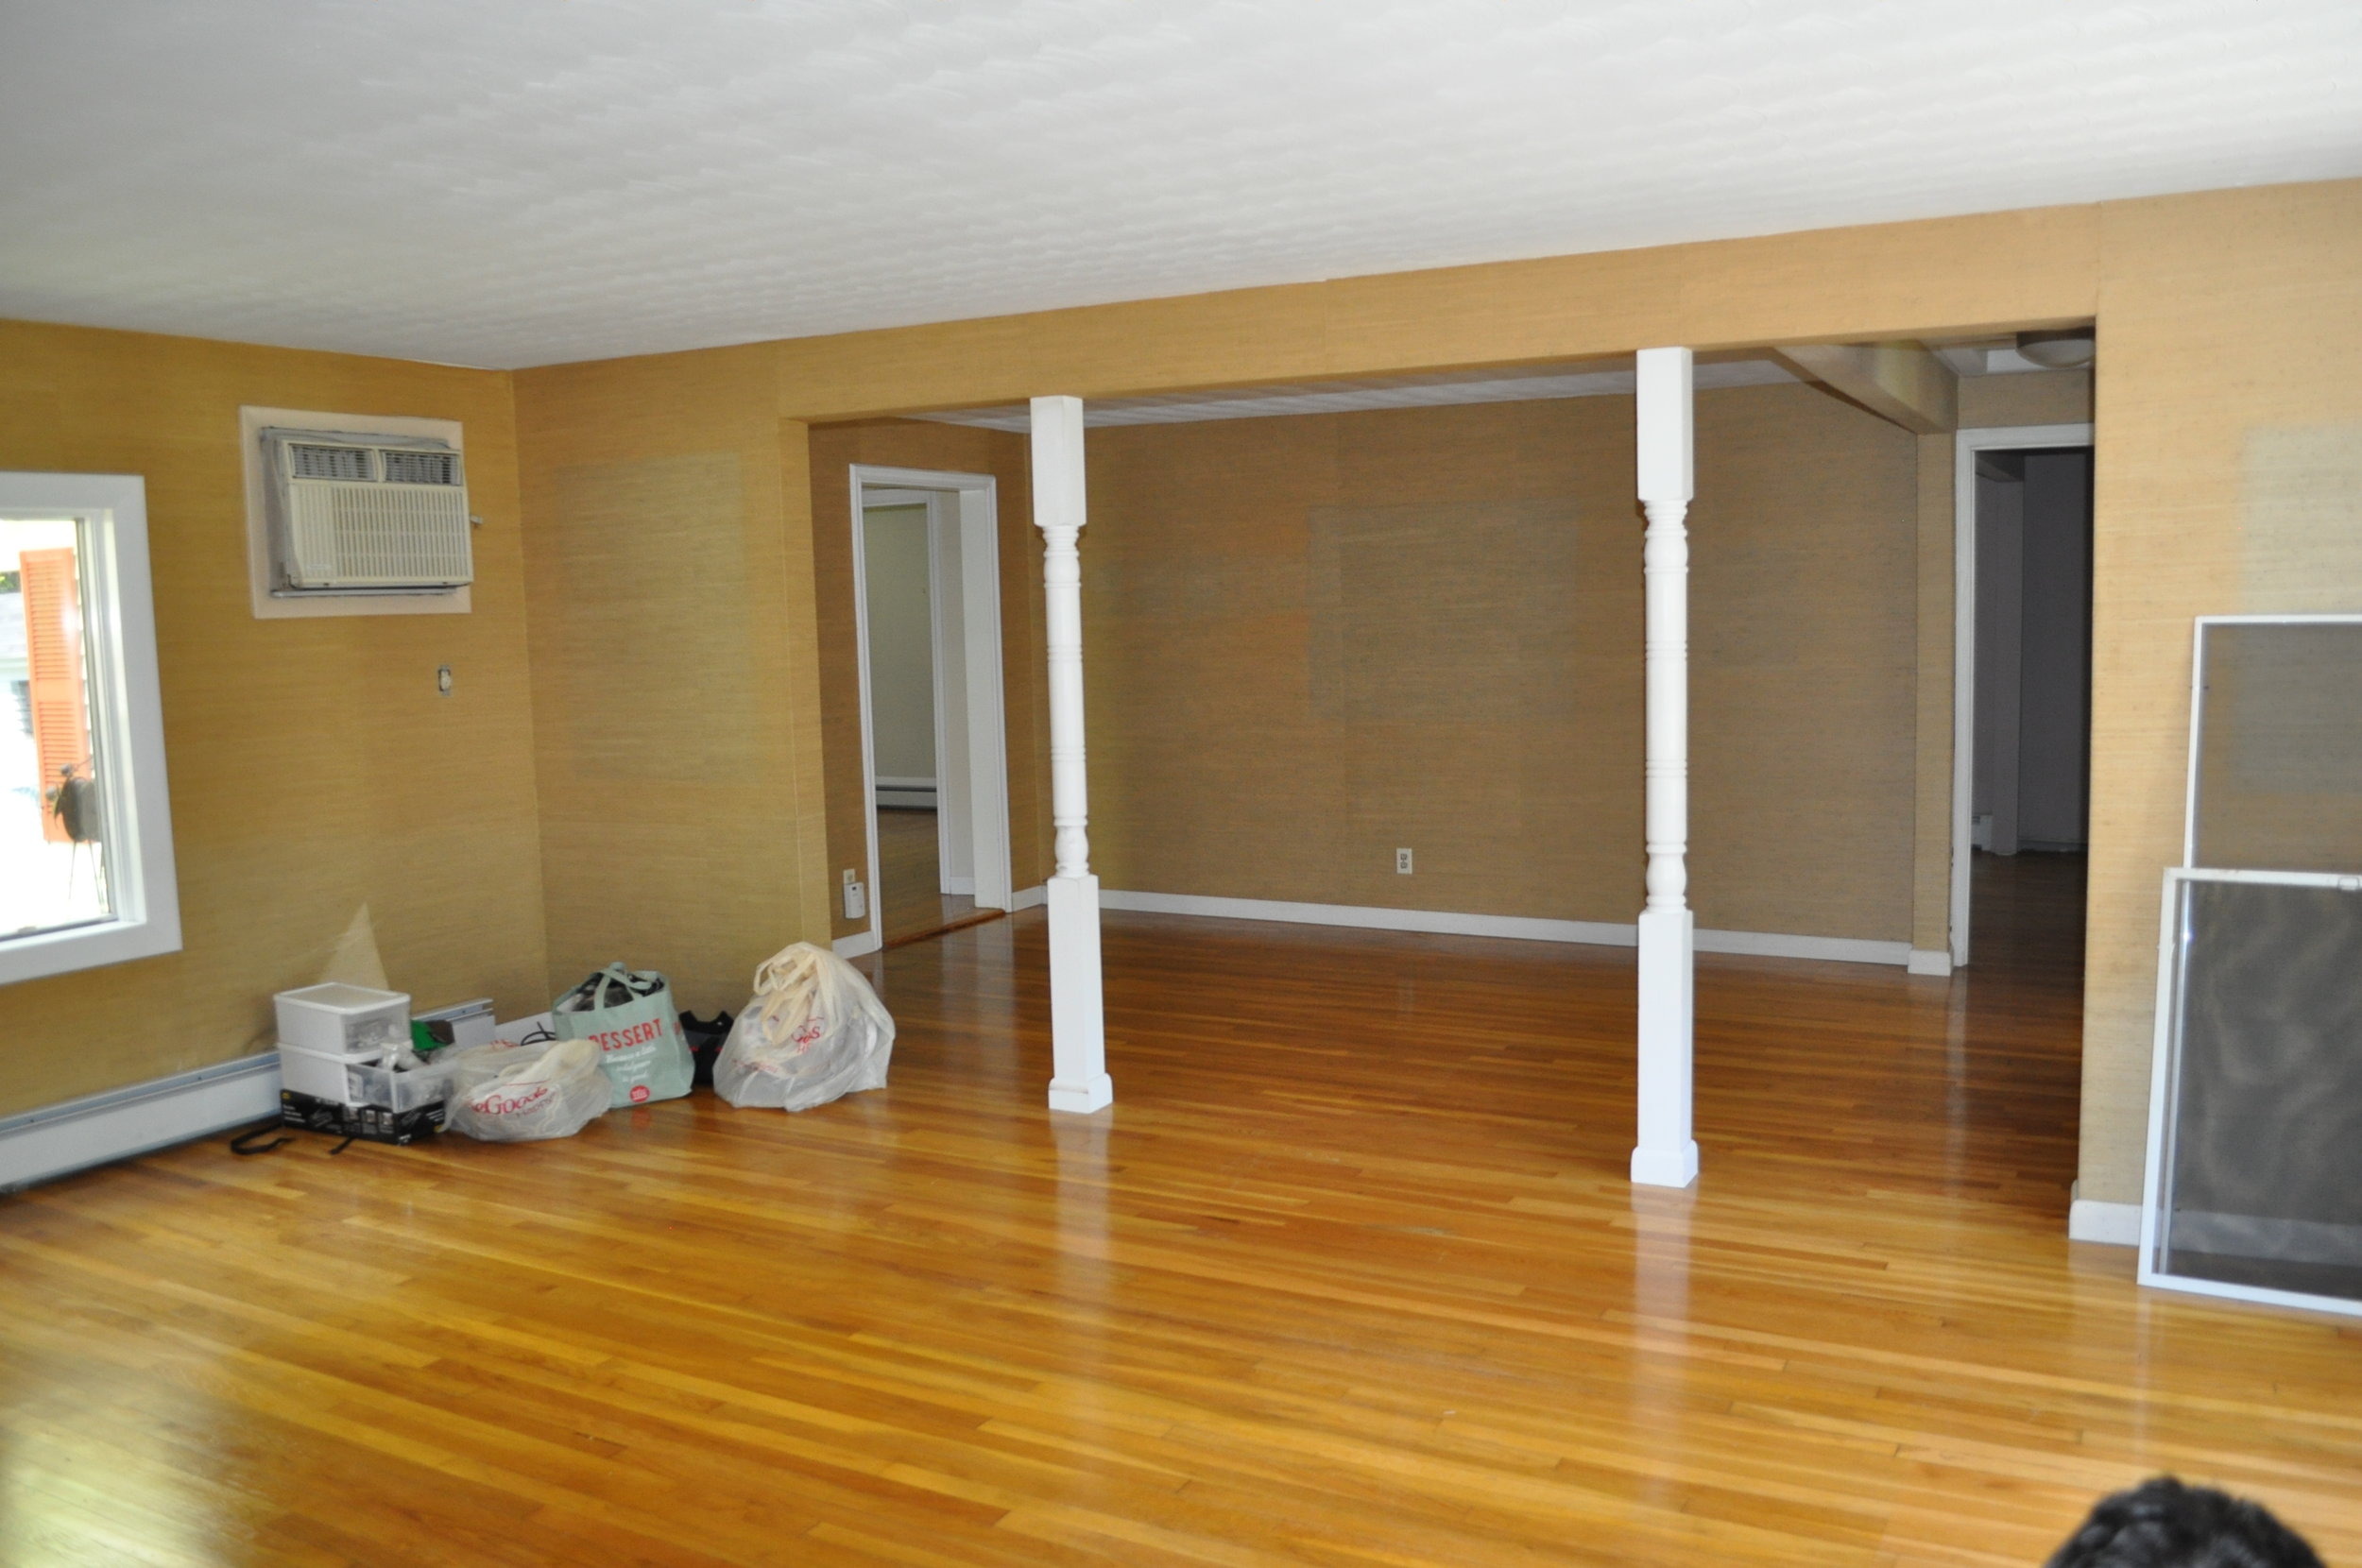
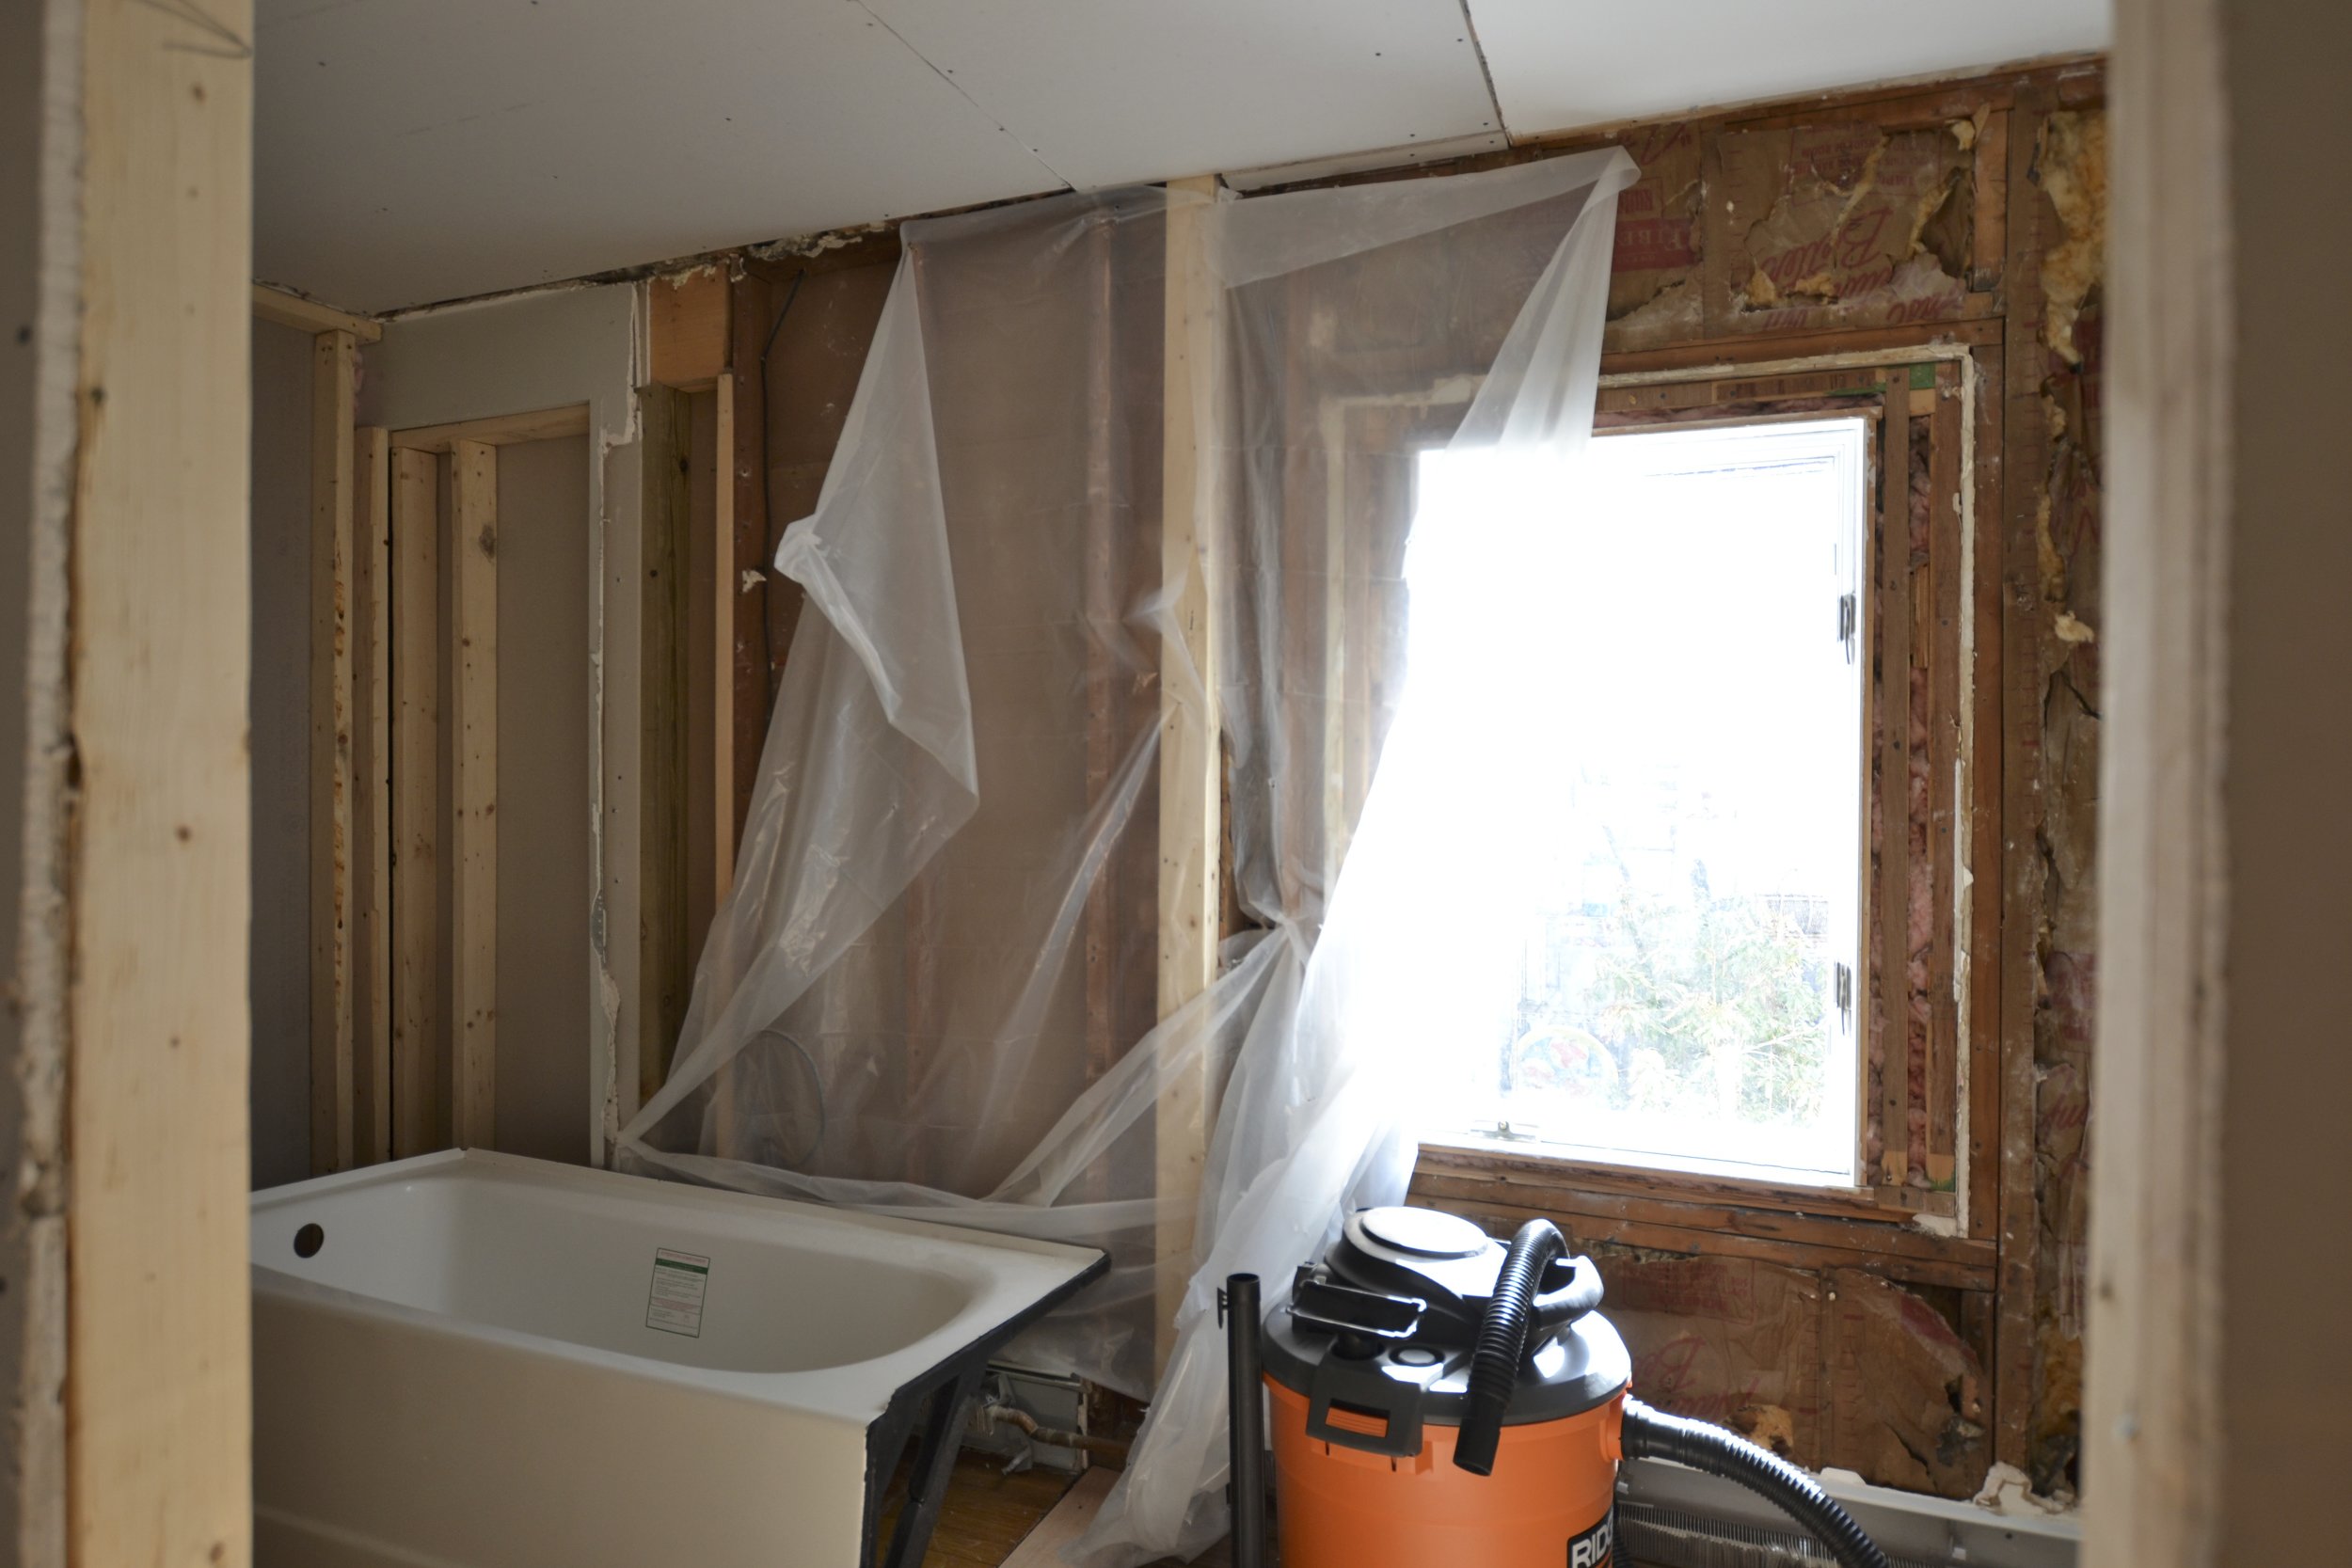
Here's a shot of the full span of the bathroom.

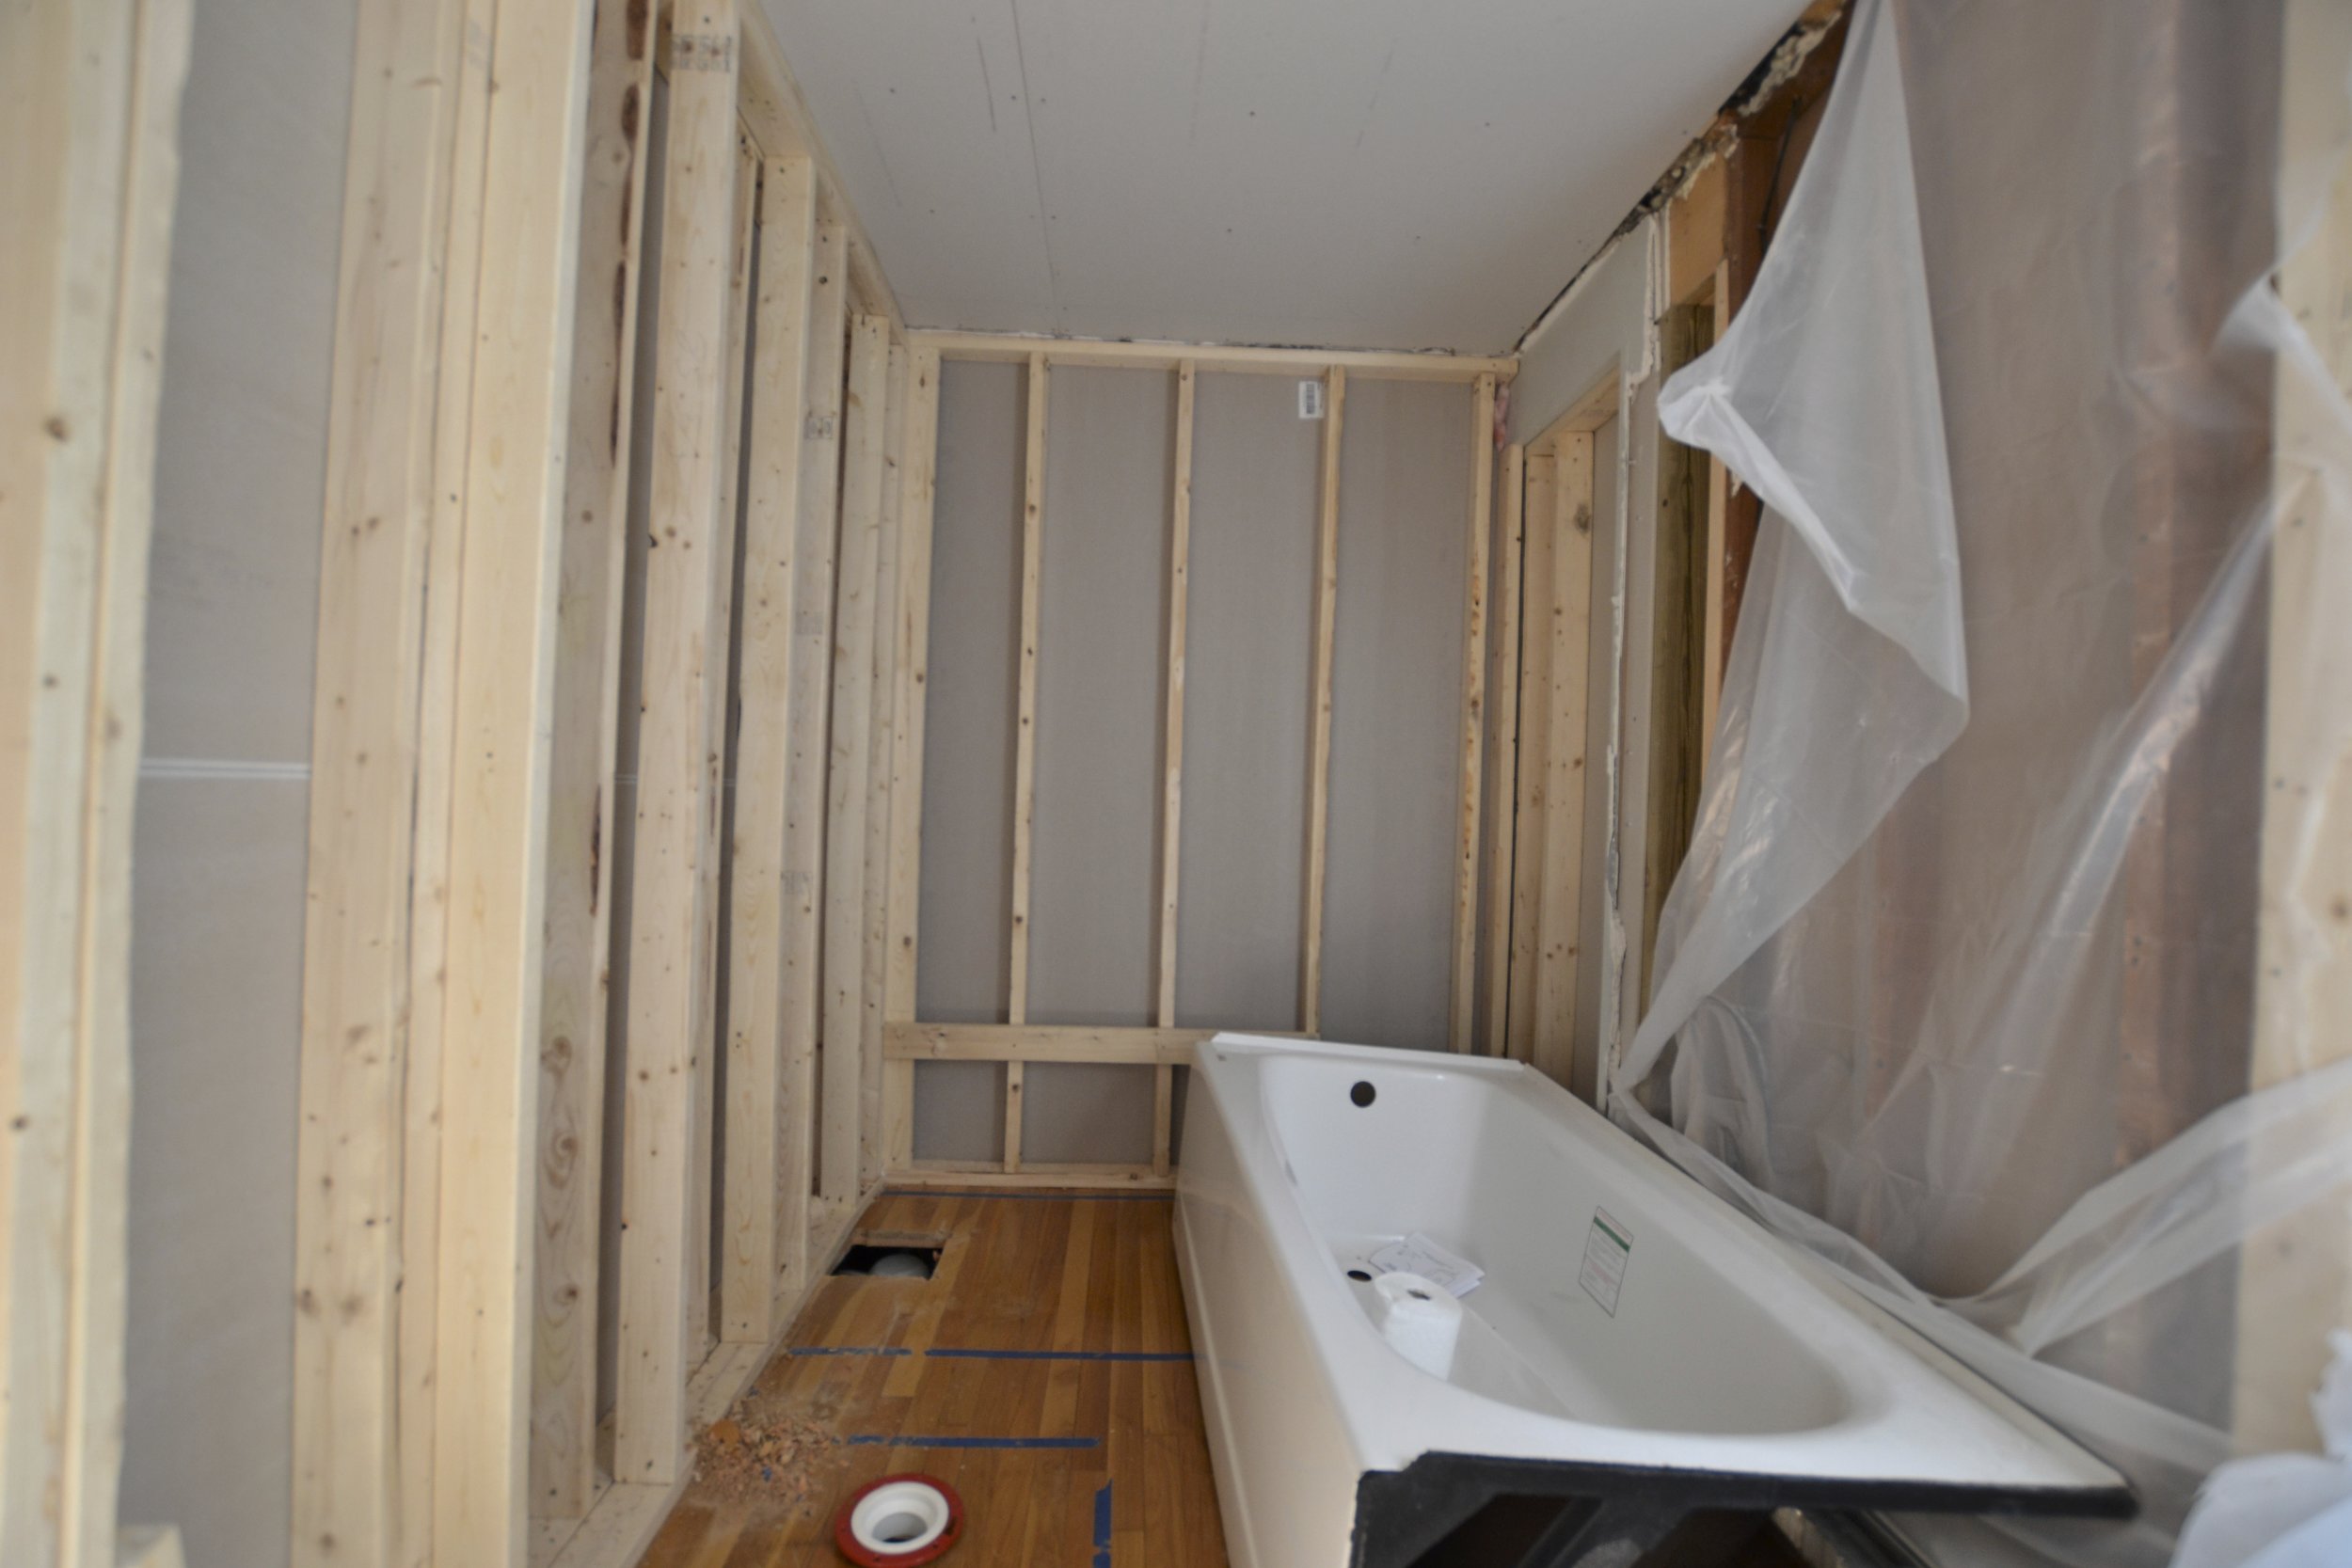
And from the other direction. Ignore the direction of the bath, it's not the finally landing spot. And note the blue painter's tape! I wasn't kidding. There are really so many critical uses for painter's tape, I may write an entire blog post about them some day.

By the Scary/Frightening/Horrifying Phase of the project we had brought in plumbers but done absolutely everything else ourselves. I'm exhausted just thinking back.  

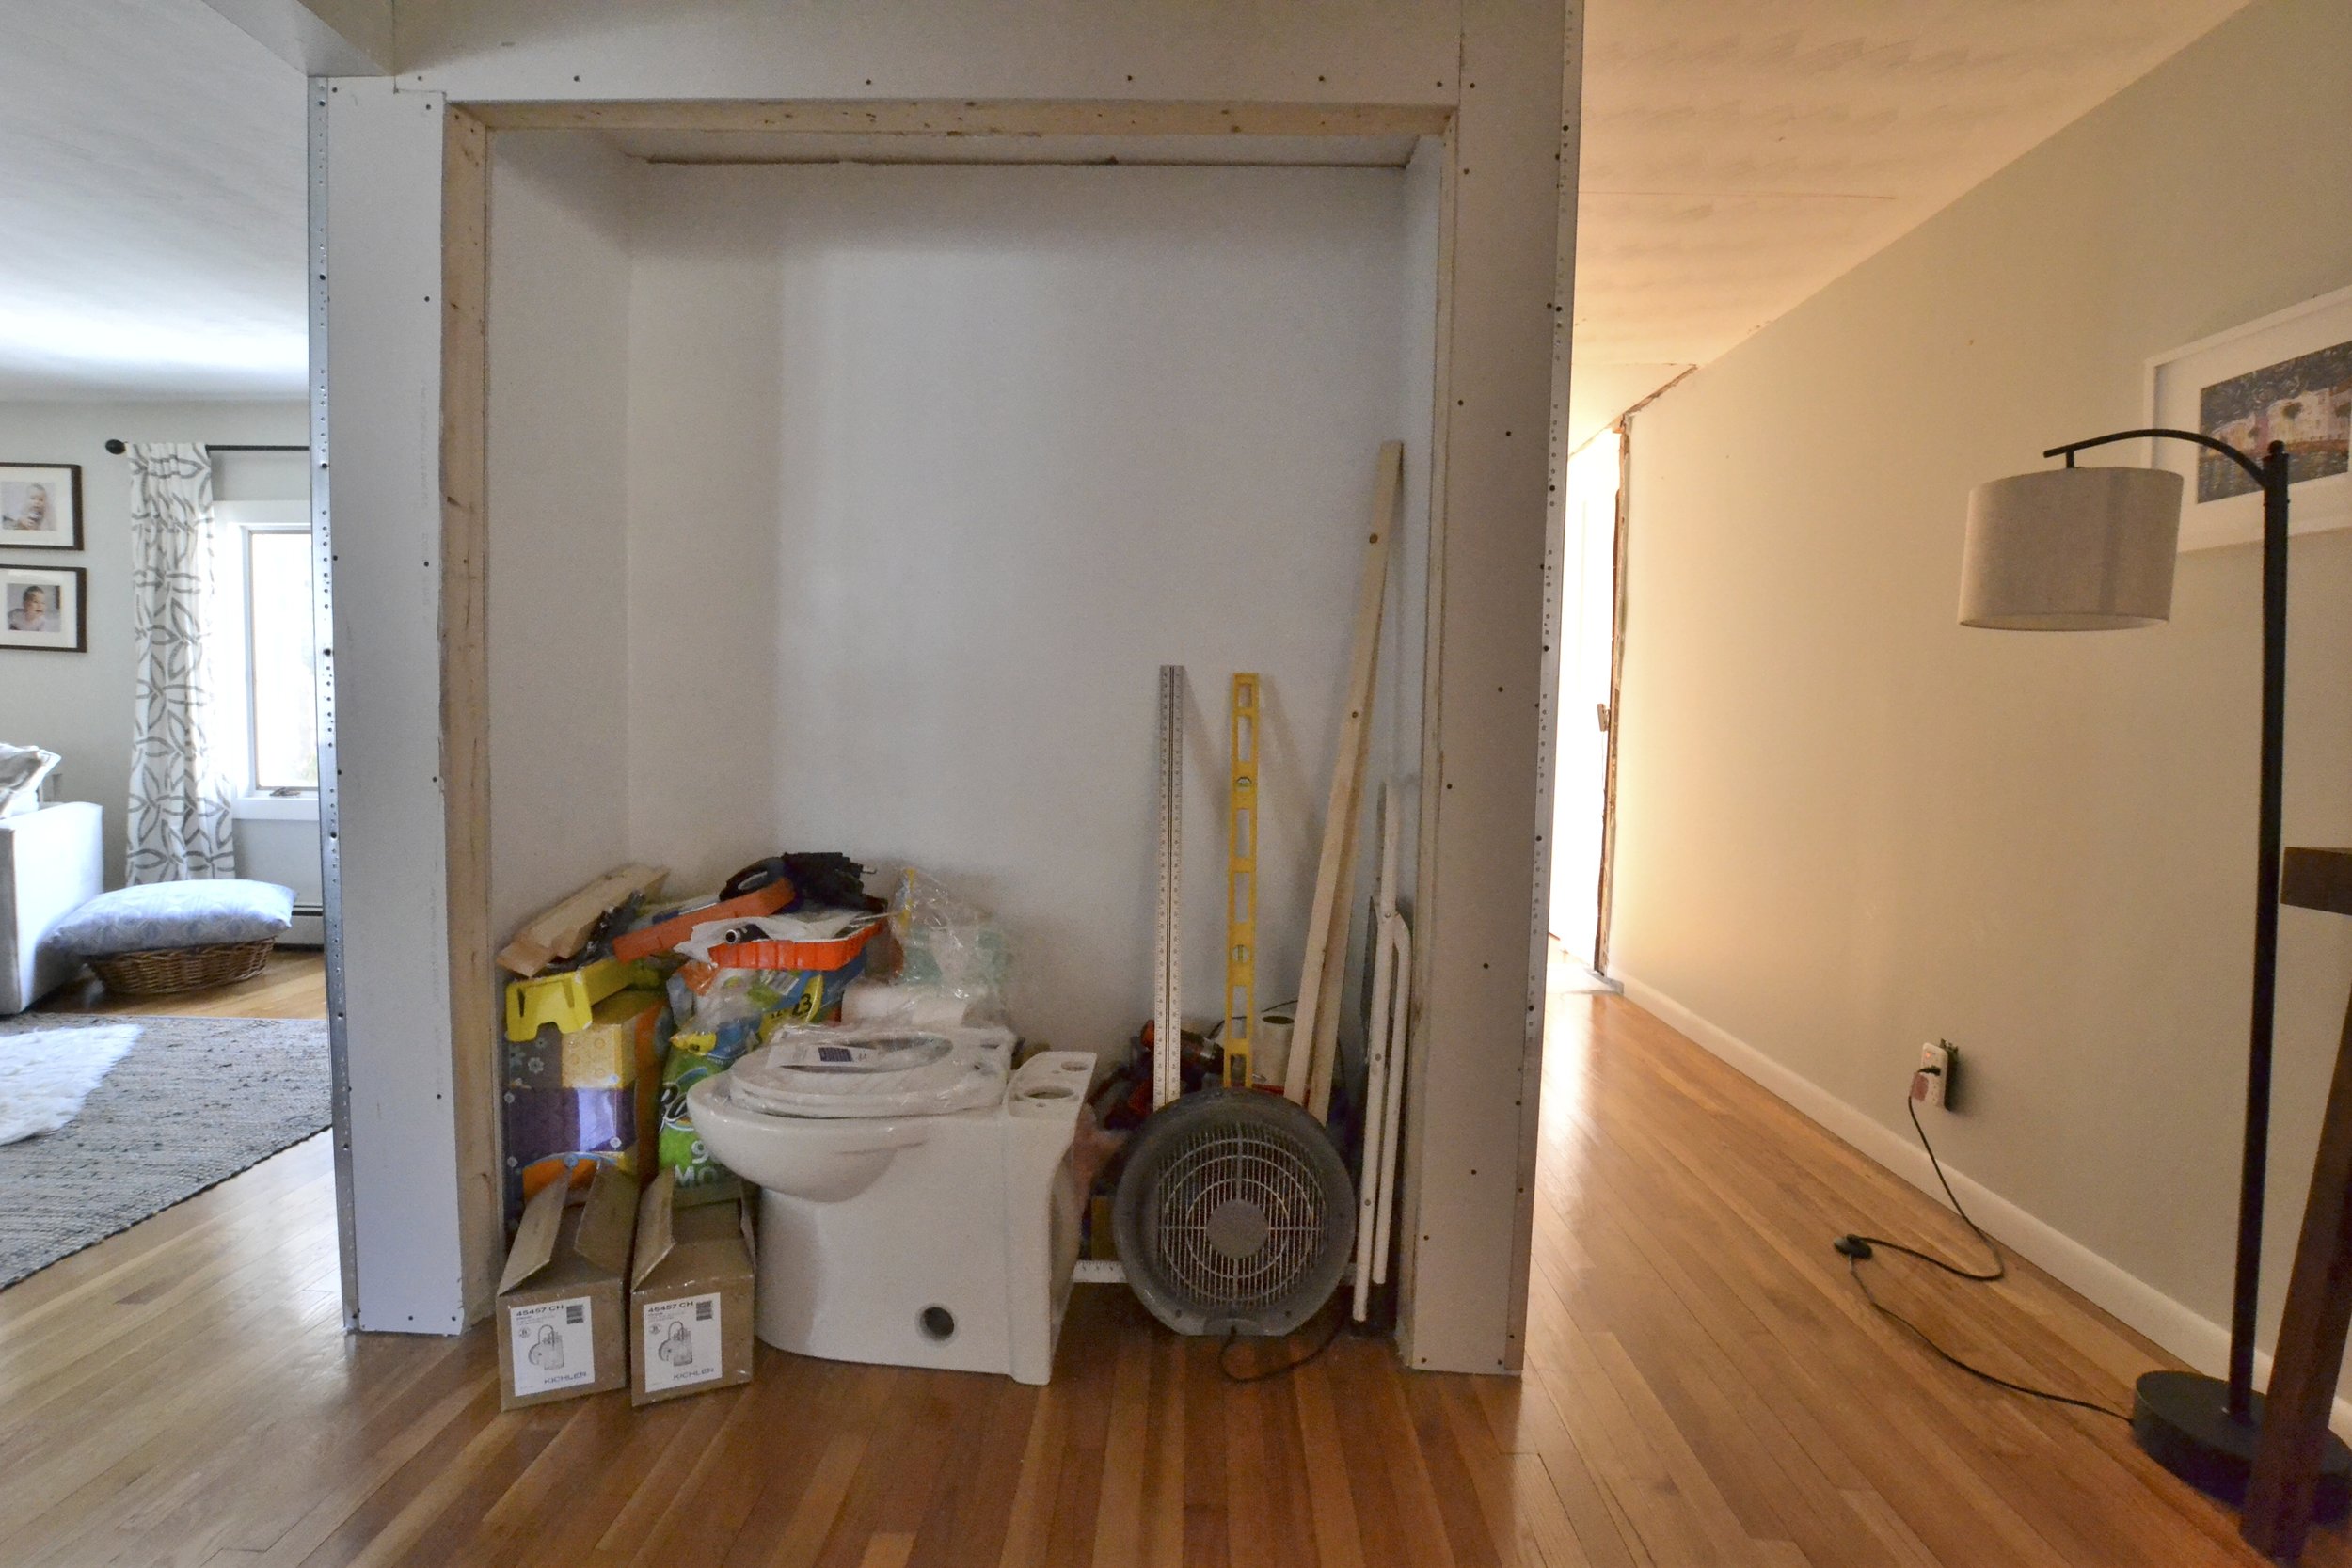
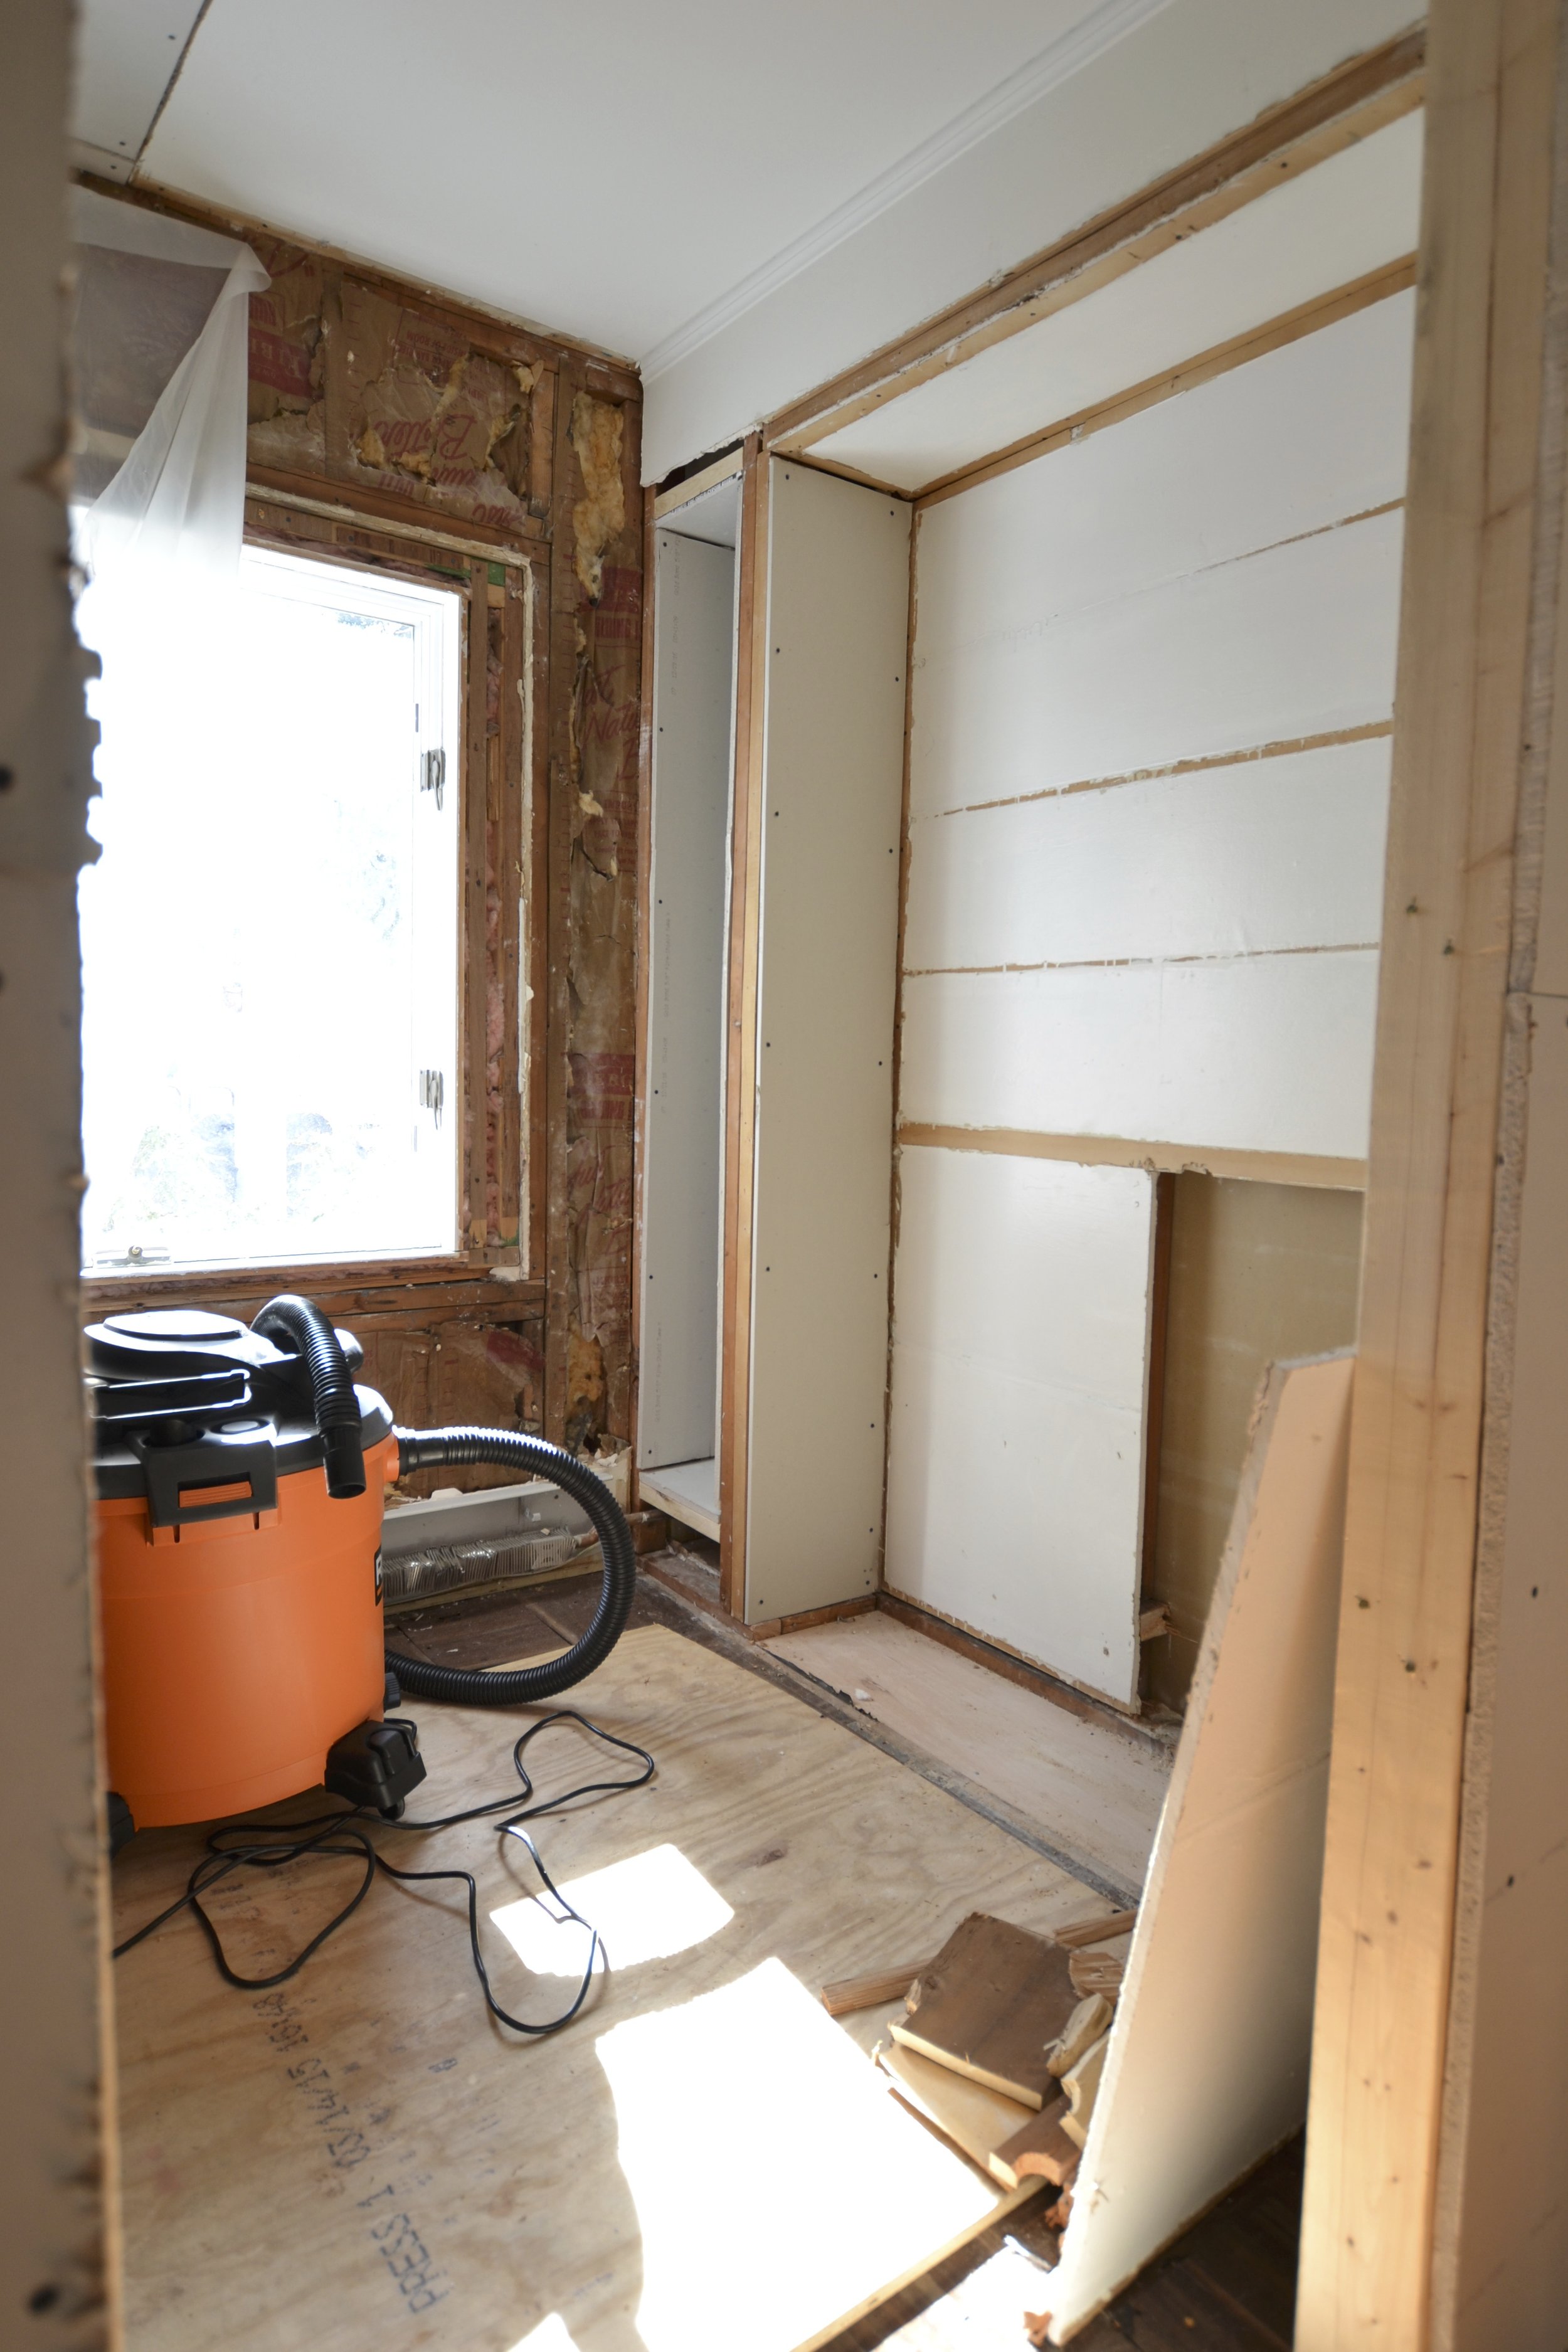
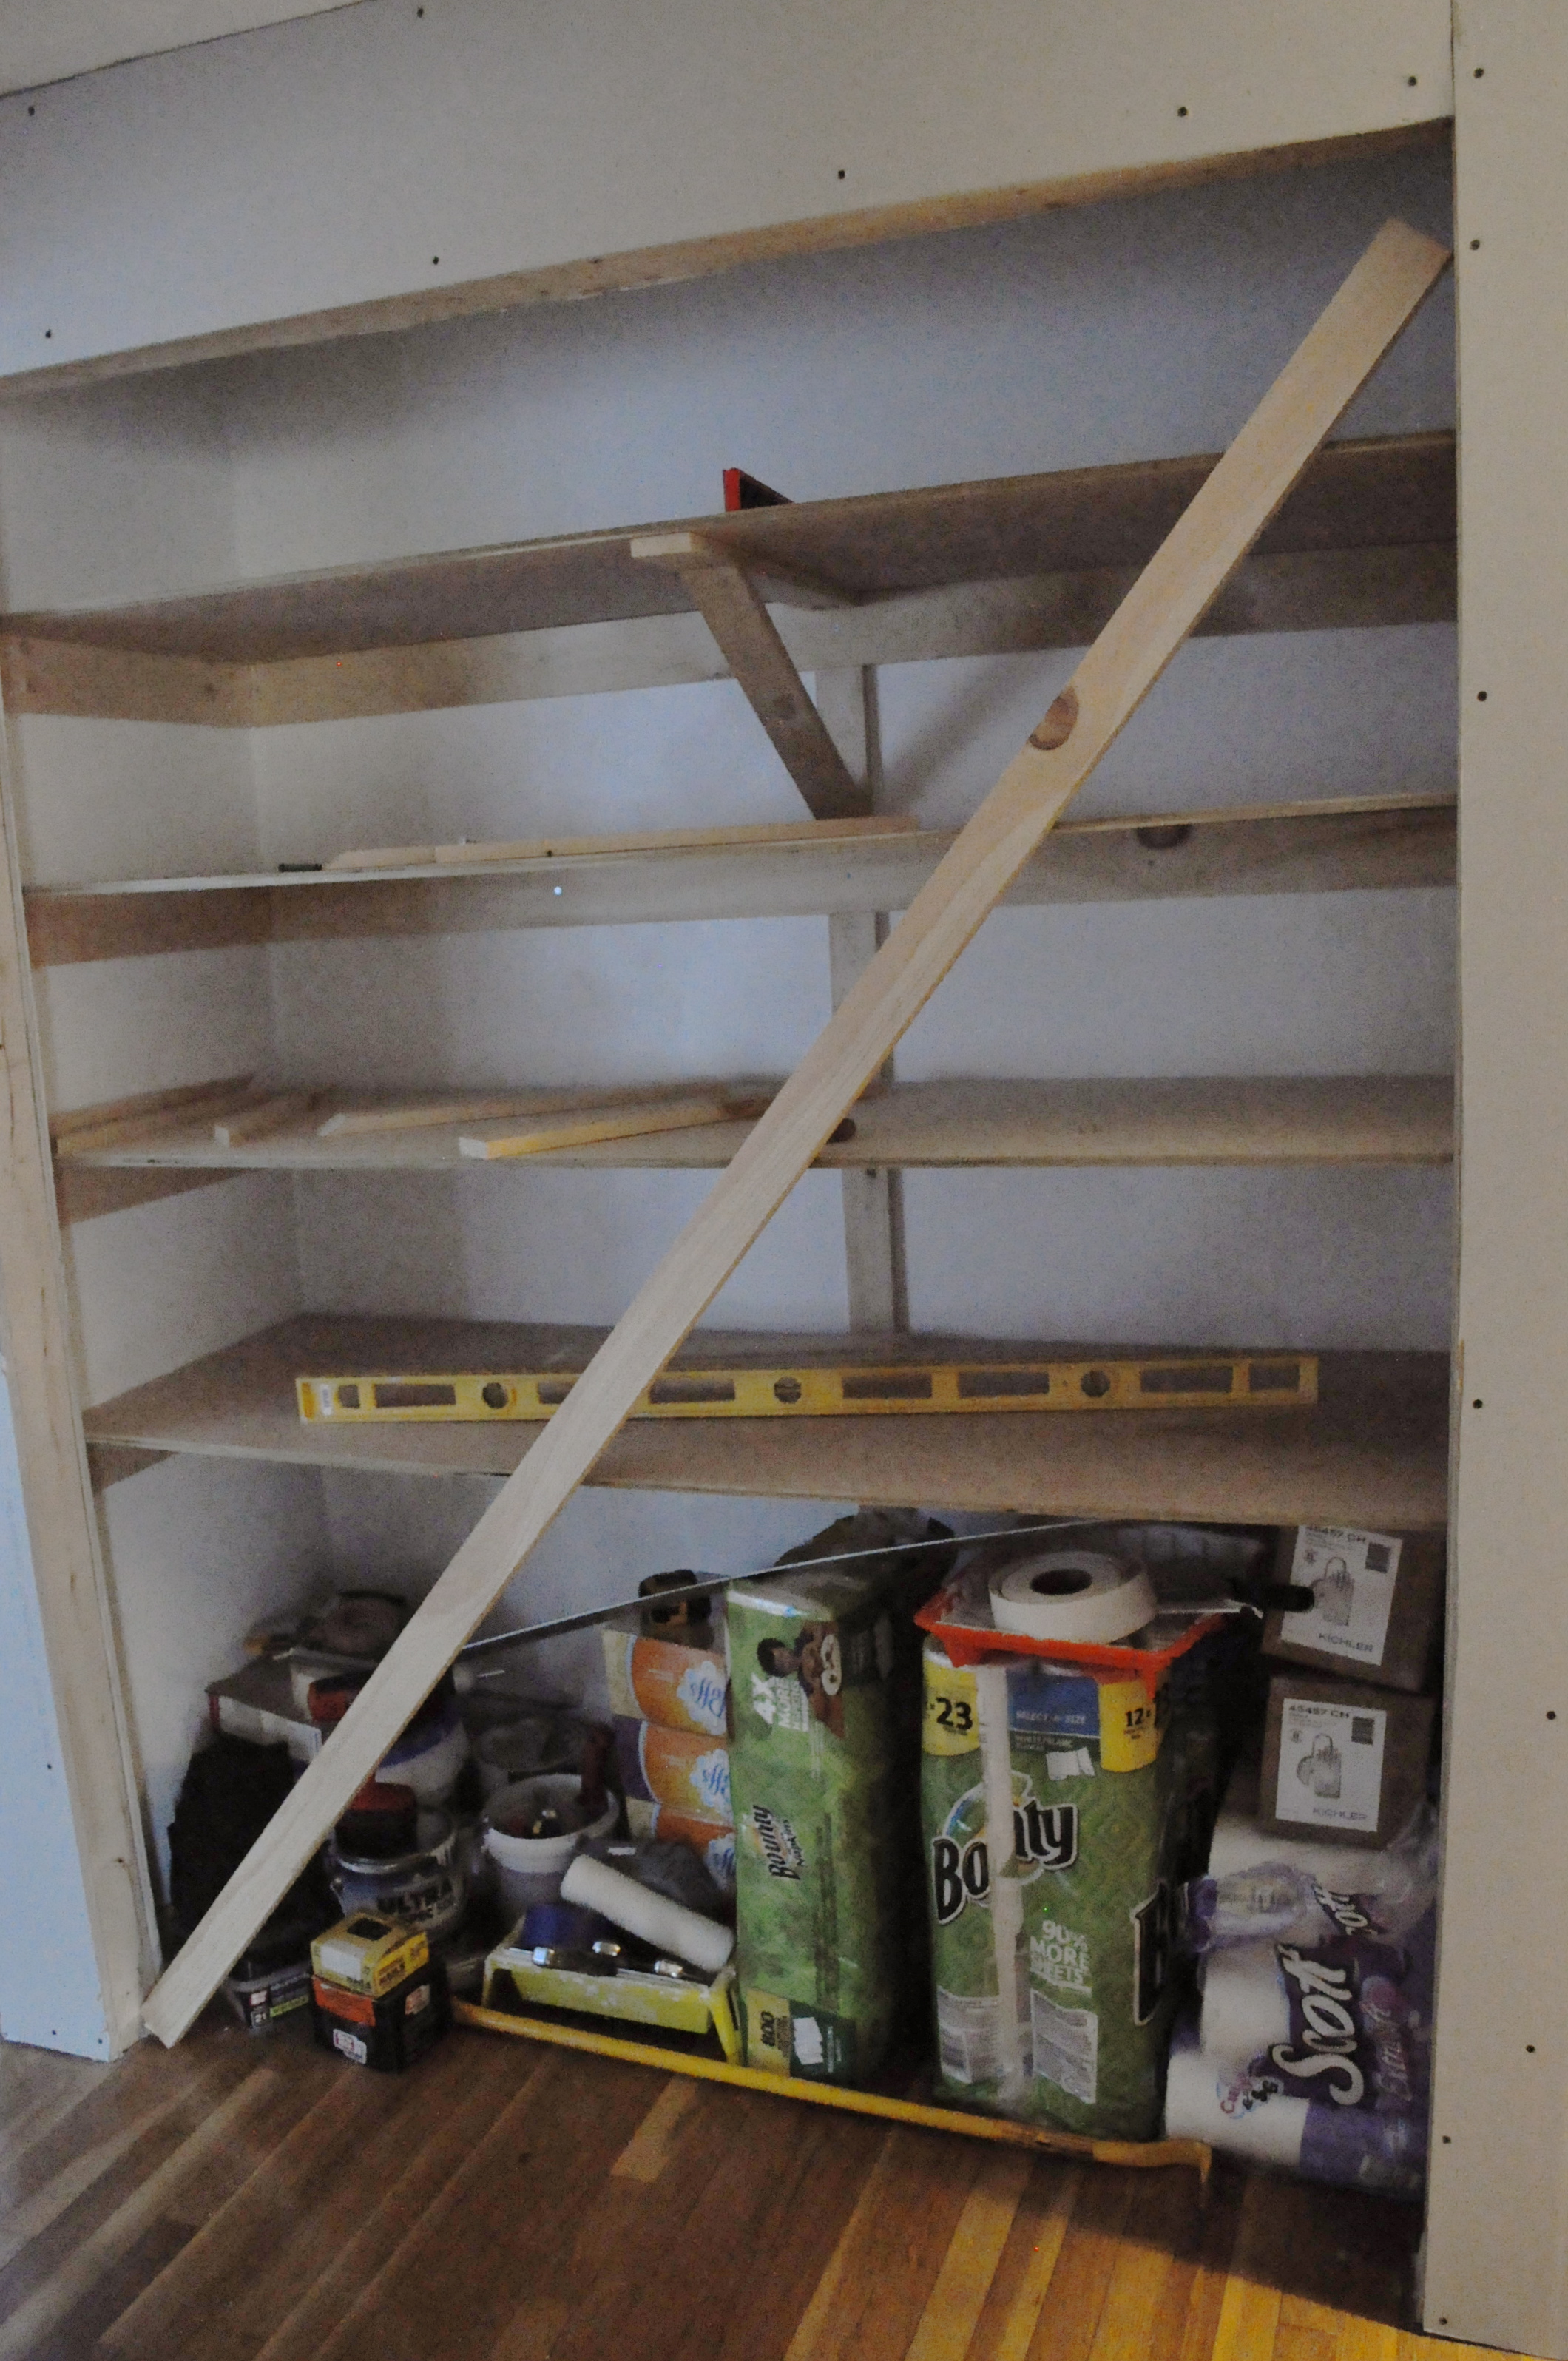
This is the linen closet we built. Just installing the shelves took a whole weekend. The physics of supporting four extra long (68"), extra wide (22.5") shelves was hard enough, but cutting them to perfect size and fitting them into the space was near impossible. Then we painted everything and installed bifold doors...multiple weekends.


And take a look at new hallway to the bathroom and kids bedrooms.


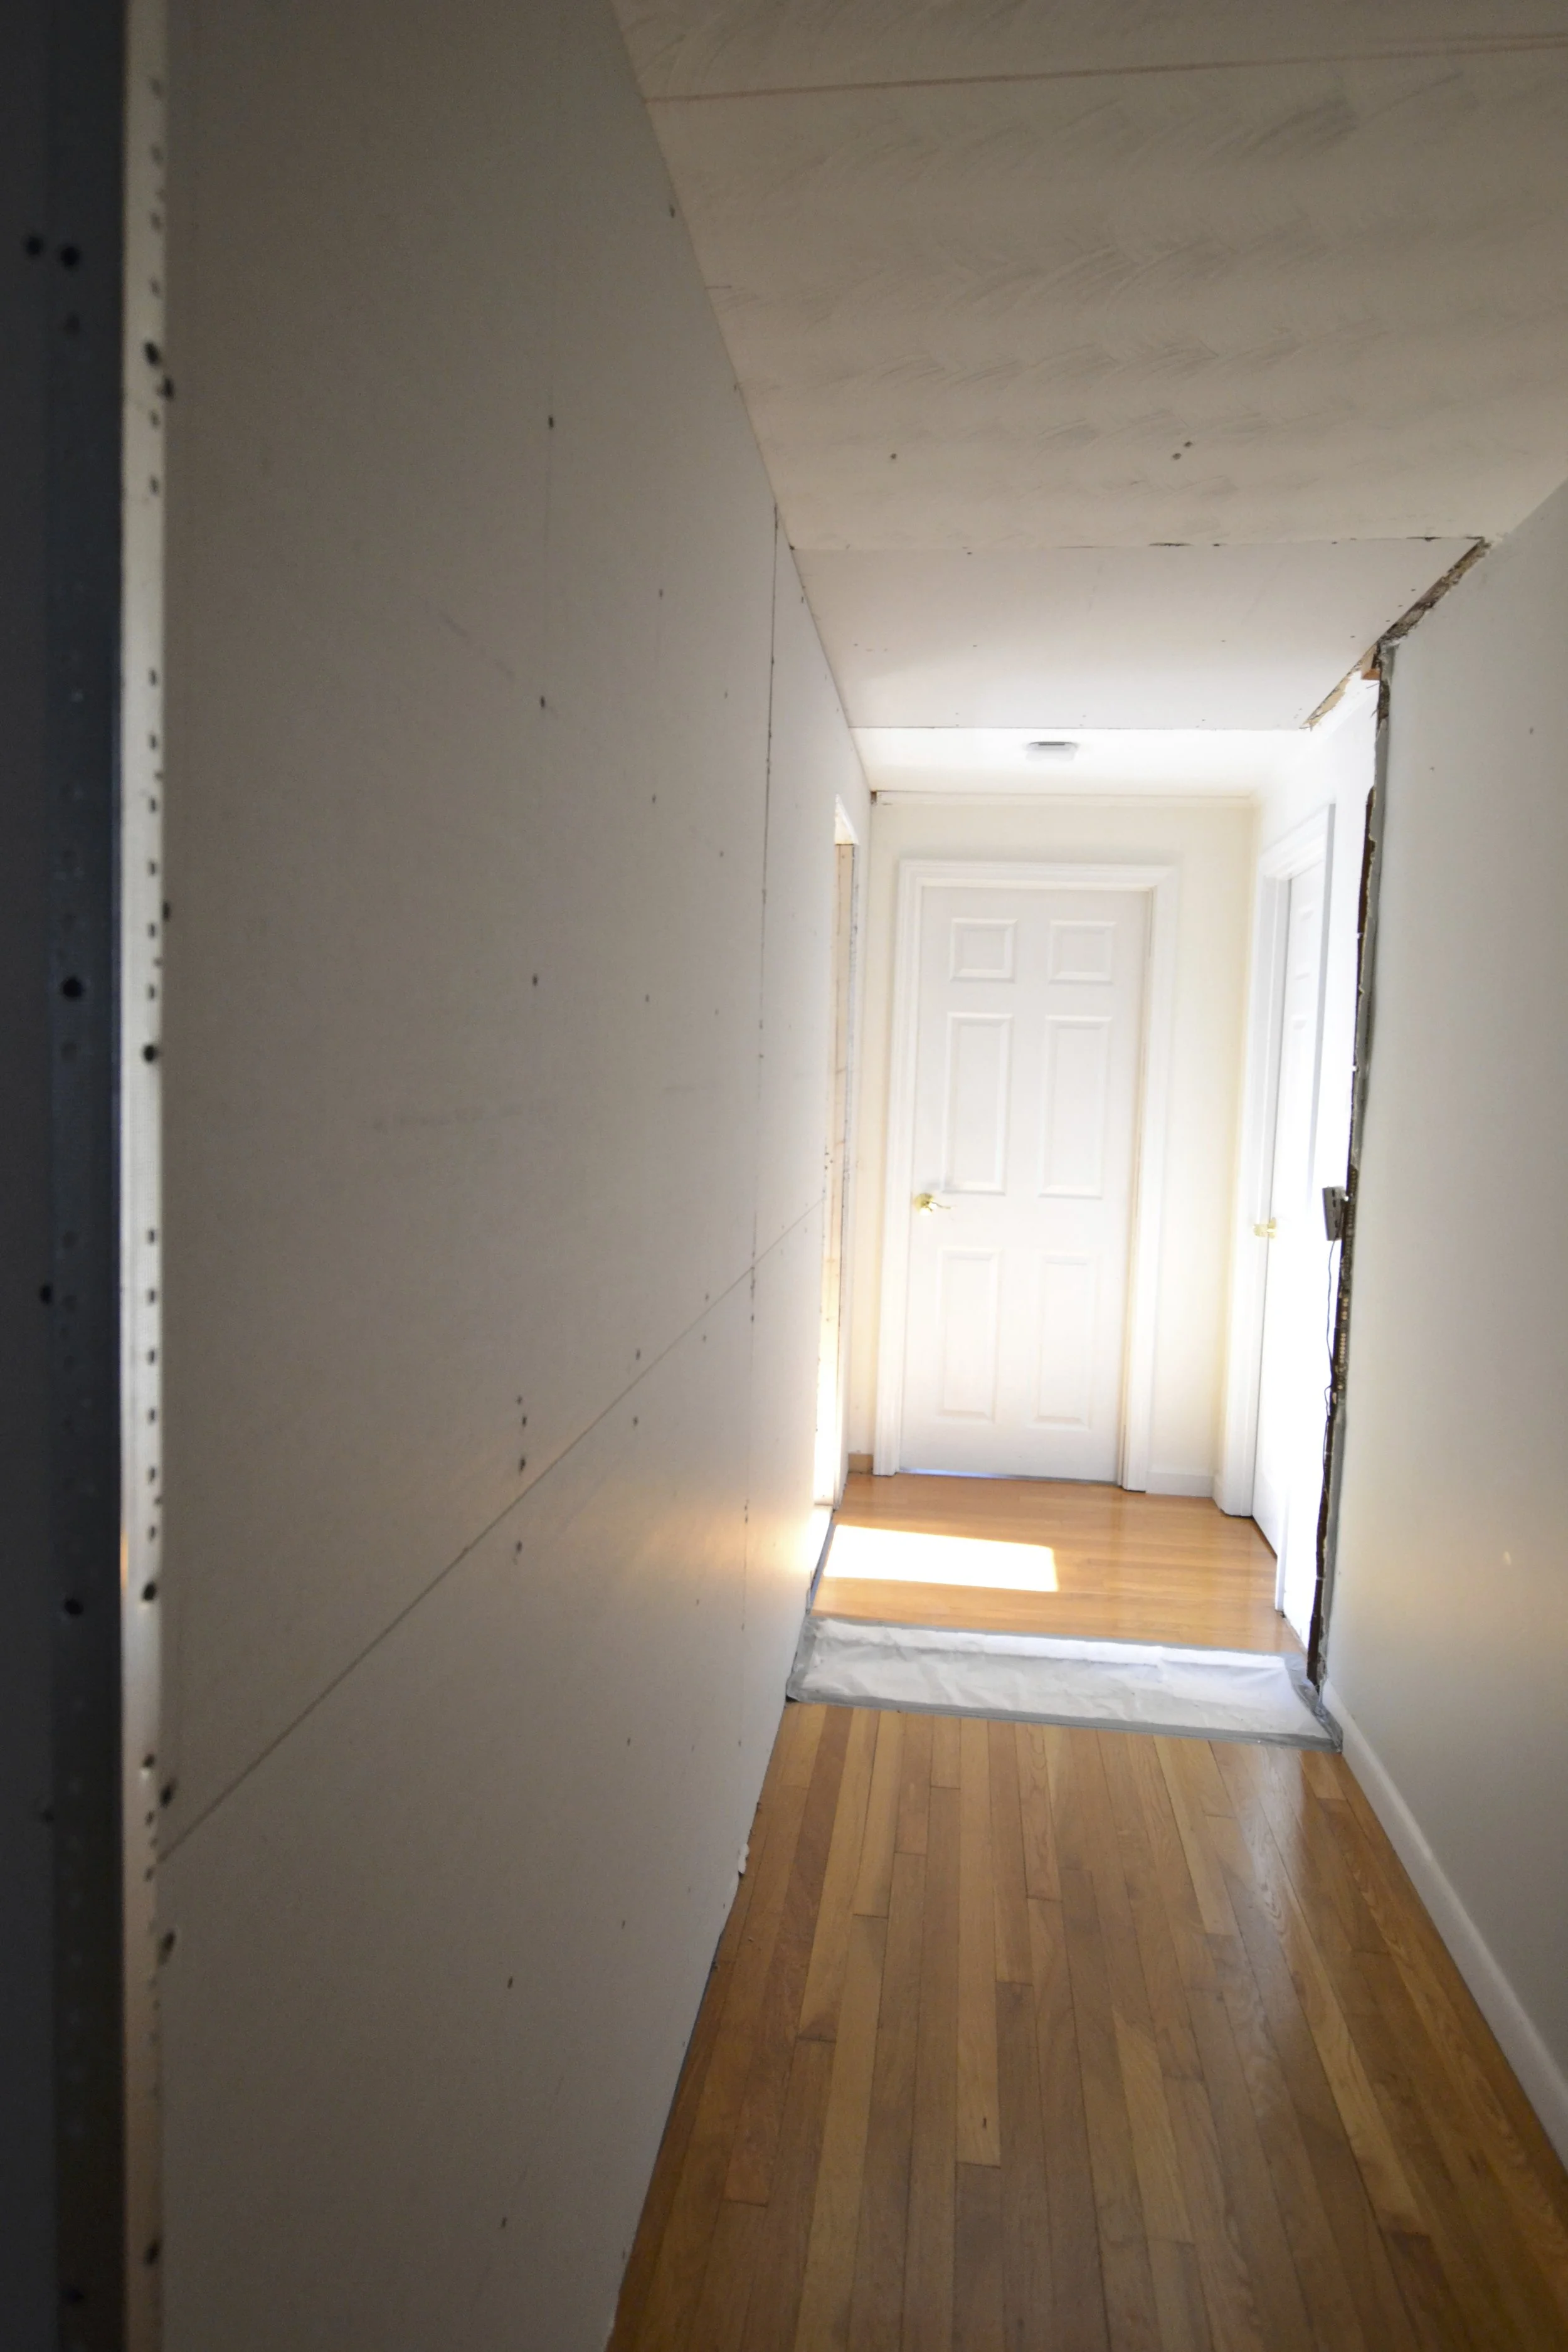
Look at all that fresh drywall - impressive, right? Look at the ceiling - scary. Look at the unfinished floor threshold - frightening. Look at the rough wall on the right where the old wall was taken down and the header was put in above - horrifying.

It was around now that we decided to retire our warrior armor and spears, and call in the pros. Plumbers and electricians were always part of the big picture plan, but now we were adding plasterers and painters and tile installers and a handyman to the list. We were gassed and, more importantly, we were out of our league. 

We weighed the amount of time it would take us to fix the hallway ceiling (and the highly imperfect end result) against the cost of hiring a specialist (and the perfect end result). And the hallway ceiling was just one of about 200 steps needed to bring us to the finish line. There was no comparison and we had no hesitation.

By May, things were moving...not at lightning speed...but moving.

DSC_0237.JPG
DSC_0235.JPG

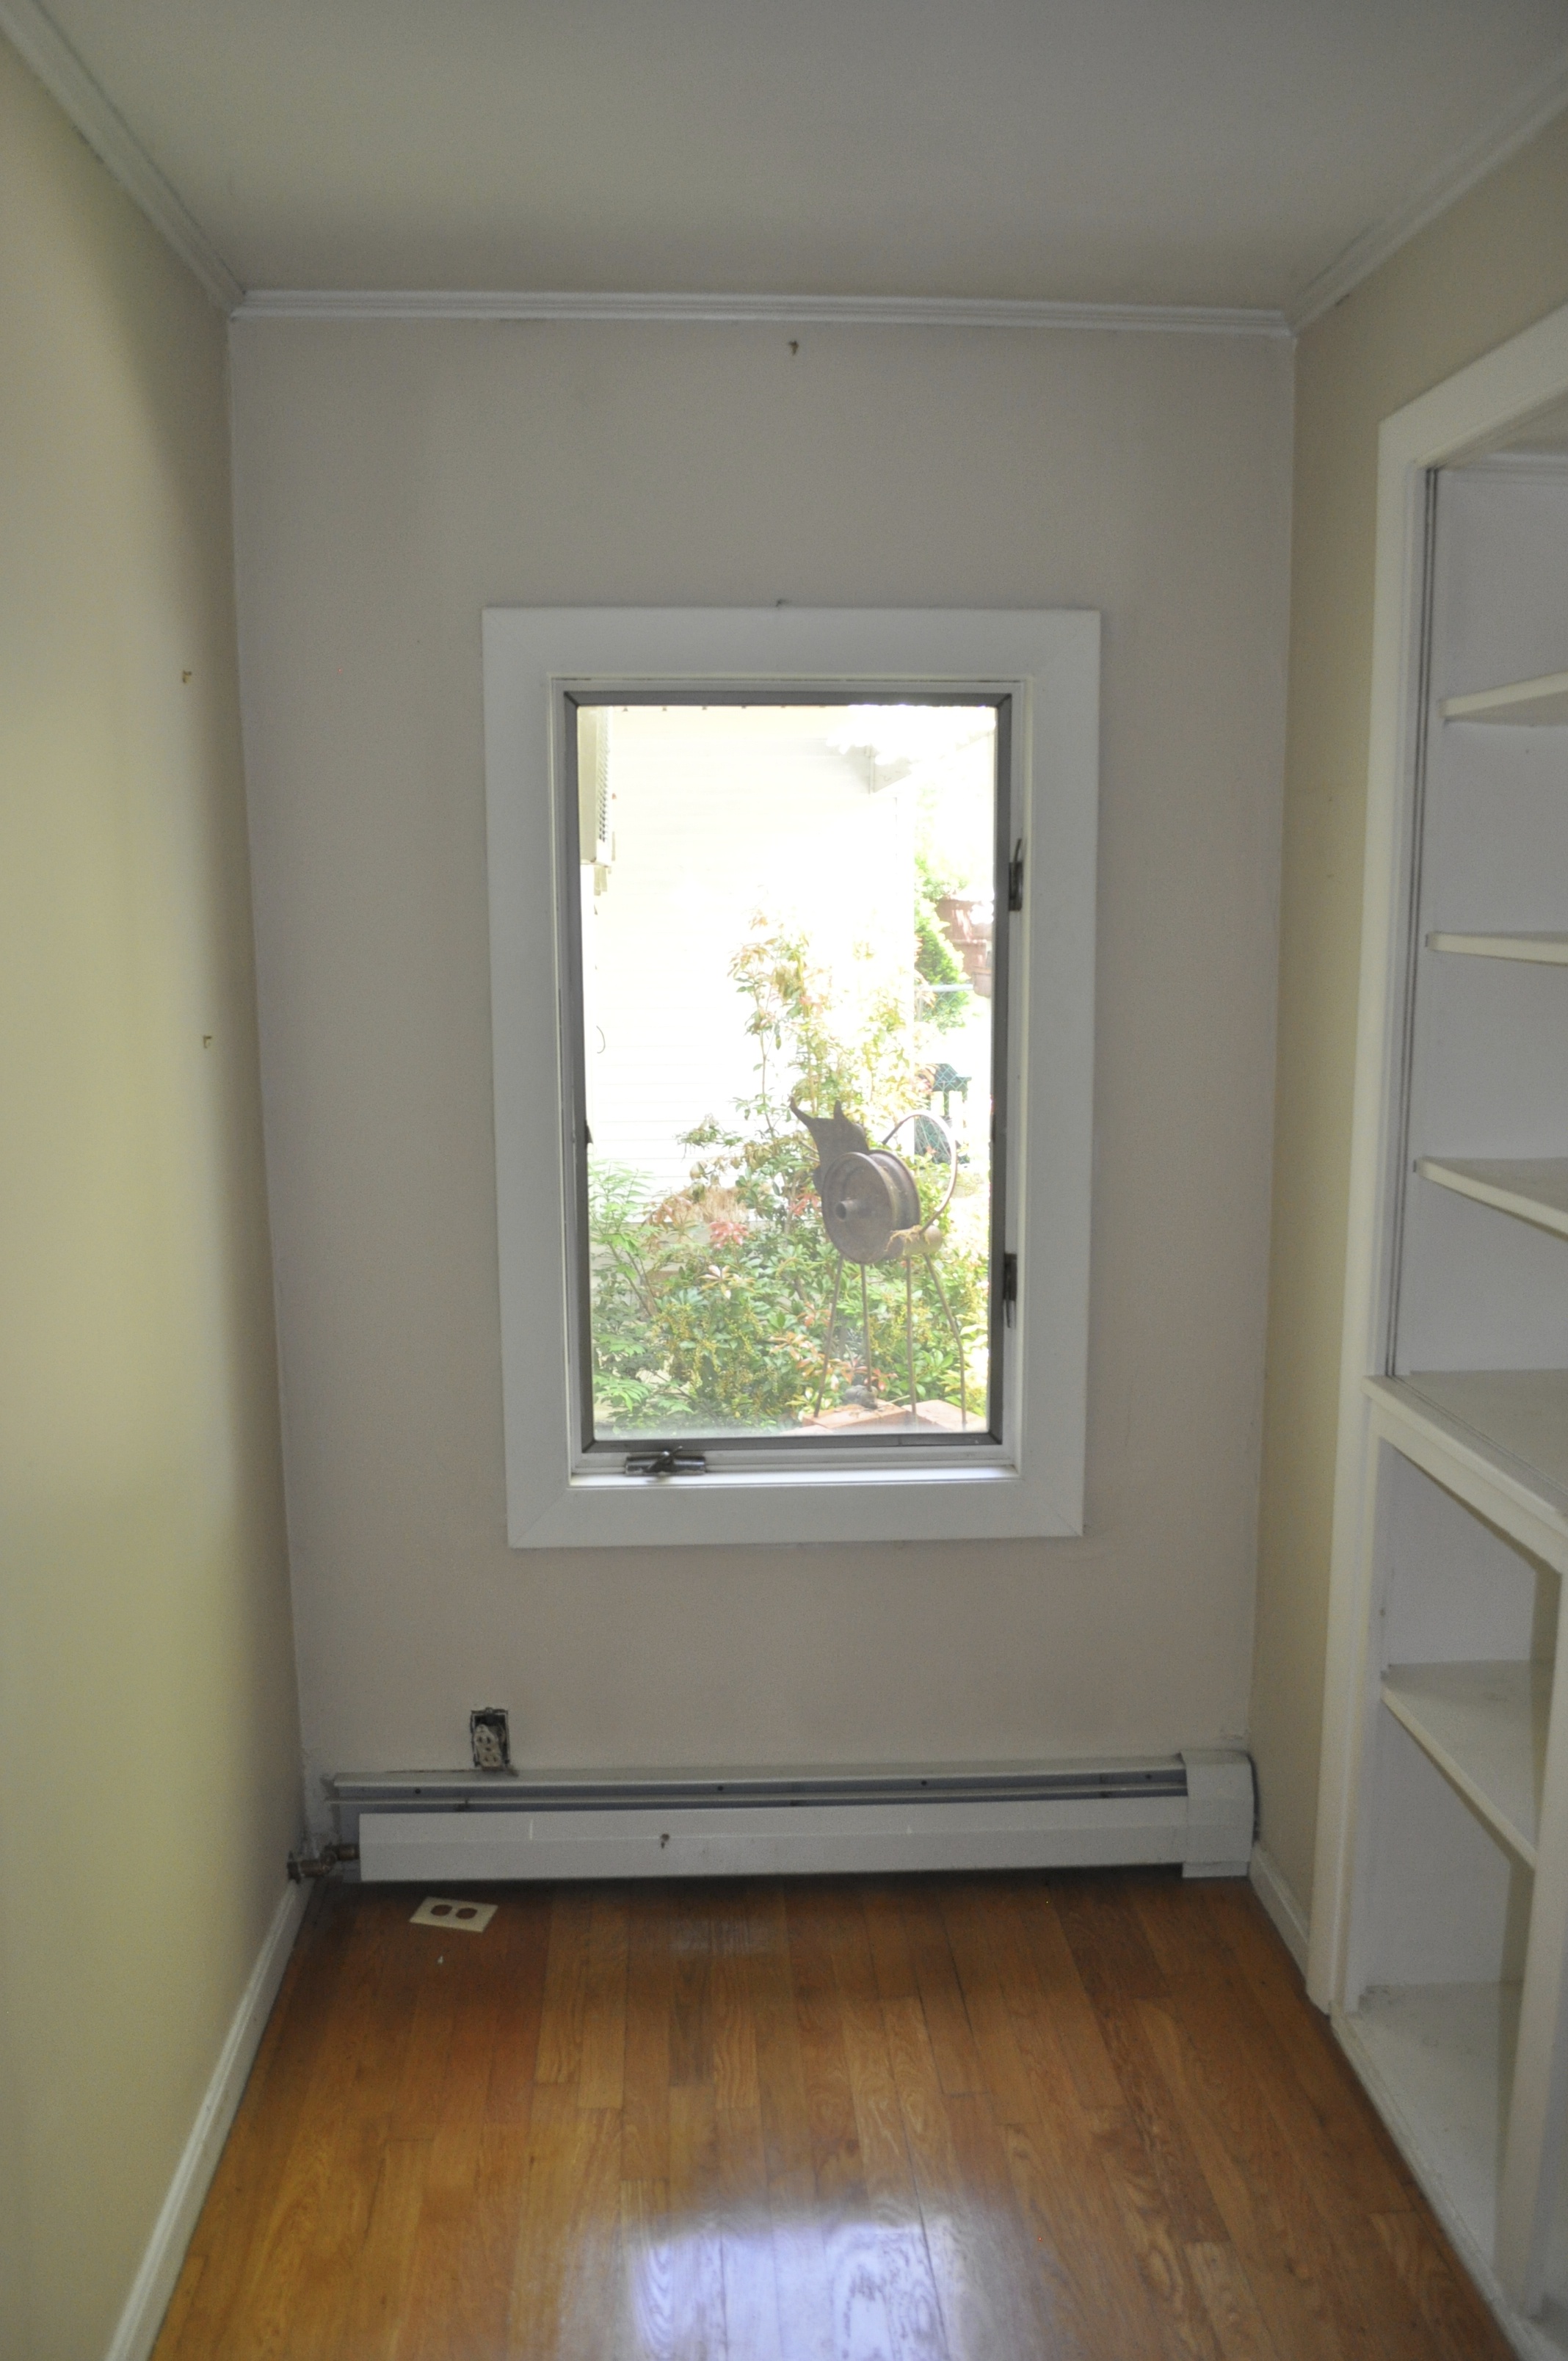
Things were looking less scary. Check out that long, thin cut out between the window and what was the built-in bookshelf. I refused to leave any space unused and I had big plans for new built-in shelving (think: towels and baskets and succulents).

The bathtub finally found it's proper home. And, yep, there's that blue painter's tape. Never let go!!!

Today, as I write this post, we have passed our final electrical inspection. We now await our plumber returning from vacation to complete the plumbing. What's another week when we've been working on this thing for almost a year. Then it's plumbing inspection, building inspection and, AT LAST, decorate. Oh, and then we get to use it. It's somehow become easy to forget that at some point this space will be a functioning bathroom, not just the idea of a bathroom.

I can't wait to share the final project with you. It's been a really long time coming.

- Leah

PS - Don't forget to check out our Instagram and Facebook feeds for sneak peaks of the bathroom in its post tile phase. That was a happy phase.

*This post contains affiliate links*

Meet Leah's Kid's Bathroom.

Let me introduce you to my kid's bathroom.

 
DSC_0170.jpg
 

What's your favorite part? The random white column or the lack of plumbing?

This is what my house looked like the day I moved in. That's grasscloth wallpaper. It covered half the house. No really, HALF THE HOUSE. You can see it is faded in some areas where the prior homeowners had furniture pushed against the wall. You can also see the seams (because it was peeling off). Grasscloth can be perfection in the right space, but this treatment was a hair on the extreme side. Apparently it wasn't broke, so they didn't fix it...

Back to the bigger issue - this isn't a bathroom. But, I knew it could be. Or, I hoped it could be. Here's a different angle.

You didn't believe me about the grasscloth, did you? 

The space beyond the columns is what my family came to affectionately call - Nowhere. It was a glorified hallway that connected the house's three bedrooms. A glorified hallway that measured 10.5 feet wide and 17 feet long. And there's more. Behind the doorway in the far left corner of Nowhere is more a useless space, known as The Nook. 


The Nook is another five feet wide, which doesn't account for the depth of a built-in bookshelf (another foot or so).

Here's a side-by-side photo to help you understand this bizarre layout. Please don't judge my arrows or, for that matter, the quality of any of these photos. They were taken pre-Gray Oak Studio and my attention to photographic quality was lacking. The arrows are pointing to 2 sides of the same wall.

When we added Nowhere and The Nook (plus the width of the wall and the built-in bookshelf) we had almost 250 square feet of space with no real use other than to connect bedrooms.

Now you have the lay of the land and, finally, we reach The Bathroom Plan! 

Pretty early on, my husband and I agreed this would be the perfect location for a bathroom for our kids. Our daughter's bedrooms were right off The Nook and, by adding a bathroom for the kids, we wouldn't be forced to survive with one full bathroom. Fast forward 2 years. We finally get the ball rolling. Our biggest hurdle was the wall connecting Nowhere to the Nook. It was load bearing. It was actually an original exterior wall of the house before a previous owner's addition.

With this in mind we tried to avoid taking it down. Why? Did I mention we decided to do this project ourselves? Yep...we did. And the thought of putting a beam in our attic felt quite hefty/horrifying for a couple of modestly experienced DIYers. Emphasis on the word modestly. So, we developed a reasonable layout that didn't require removing the wall and instead made an additional opening in the wall the size of a door.


As you can see in my highly sophisticated and accurate schematic (nothing about the above chicken scratch is proportional), we would leave the load bearing wall for the most part and just take out a few studs to create another doorway/hallway/pass through within the bathroom. The bathtub would butt against the remaining (load bearing) wall and leave just enough space for the toilet. Meanwhile, the vanity and sink would be on the other side of the wall. For a bit we (sort of) bought into this layout because had vacationed in a rental house once with a similar setup.

We spent months with blue painters tape on the floor, which mapped out the precise size and location of all the components. We would sit on our painter's tape toilet and practice getting in and out of our painter's tape shower. I can't stress enough the importance of this part of the planning process. For anyone at the jump off of a renovation - put some painters tape on the floor and really see/feel what a space will be when it's changed. It will help you realize what doesn't work and, more importantly, open your mind to possibilities you wouldn't have otherwise considered. One more tip while I'm at it, when it comes to bathrooms it's never too early to bring in a plumber - there's a difference between where you want all those behind-the-wall-pipes to go and where they can actually fit. 

After living for a while with our painter's tape bathroom we realized it could technically work, but it would be awkward and very cramped. After all the work it would take (that we would do ourselves), did we really want a finished product that was awkward and very cramped? Didn't sound like a real win even if it did get us another bathroom. In stepped an incredibly handy (major understatement) and incredibly generous family member. He talked us and walked us through the process of fully removing the load bearing wall. And, he pushed us to go for it. If we were going to take on this project, we should TAKE ON THIS PROJECT. And, he would help. 

We reconfigured the layout without the load bearing wall. 


Well then. That's a bathroom. Removing the load bearing wall allowed for so much flexibility in the layout and so much more space. Nothing about the new layout felt awkward or cramped. Again, we put down painter's tape. This time we practiced dubbing in the middle of our large and open bathroom floor. The was no question that the wall needed to come down. 

Last October, it did. 

Here's a huge hole in our ceiling where the wall used to be and the beam went. 


And here's shot from when it was finished and cleaned up. 

I'm going to stop here for now...I know, a real cliff hanger. But if you'd like to see some sneak peaks of the current state of this space, check us out on Instagram (all those 4x8 subway tiles!!!). 

And, stay tuned. I think this story is going to have quite the fairy tale ending.

- Leah